Ah, Chocolate Mint Pie! There’s something magical about it, don’t you think? The first time I experienced this divine dessert was at a family gathering when I was just a kid. I remember sneaking into the kitchen, lured by the cool breeze of the refrigerator and that minty chocolate aroma dancing through the air. It was a warm summer evening, and everyone was gathered around, sharing stories and laughter while I plotted my next slice of joy. This pie holds a special place in my heart, a blend of nostalgia and happiness that never fails to wrap me in sweet comfort. The best part? It’s incredibly easy to make, yet it feels like an exciting treat every time you serve it. Trust me, once you take a bite of this luscious creation, you’ll be coming back for seconds—and probably thirds!
Why You’ll Love This Recipe
Honestly, who doesn’t love a dessert that’s both delicious and easy to whip up? This Chocolate Mint Pie is crowd-pleasing and has that delightful combo of rich chocolate and refreshing mint that somehow makes your spirit feel a little lighter. Whether it’s for a summer BBQ, a cozy holiday gathering, or just a spontaneous weeknight treat, you can depend on this recipe to steal the show. It’s quick to prepare, doesn’t require any complicated ingredients, and looks beautifully impressive when served. If you ask me, it’s the perfect dessert for anyone looking to bring a little cheer into their life—or someone else’s!
What It Tastes Like
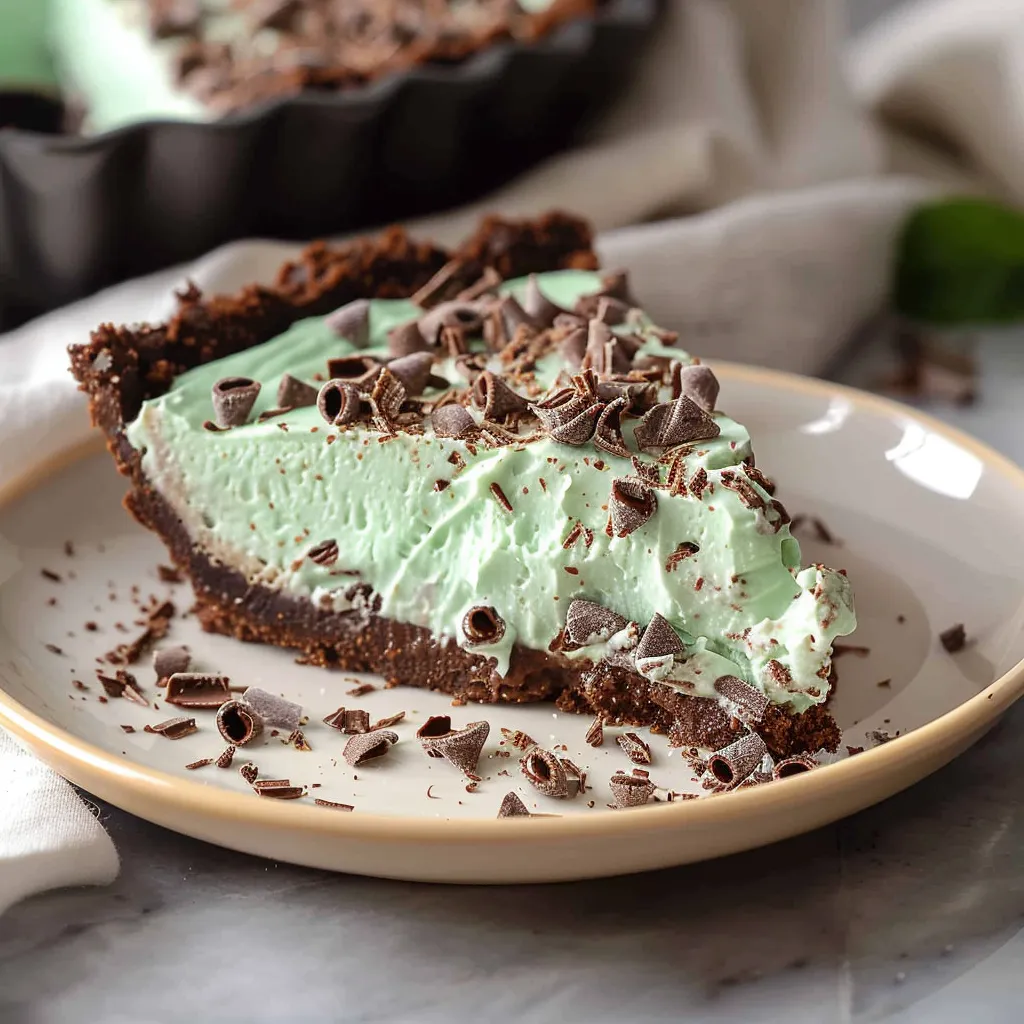
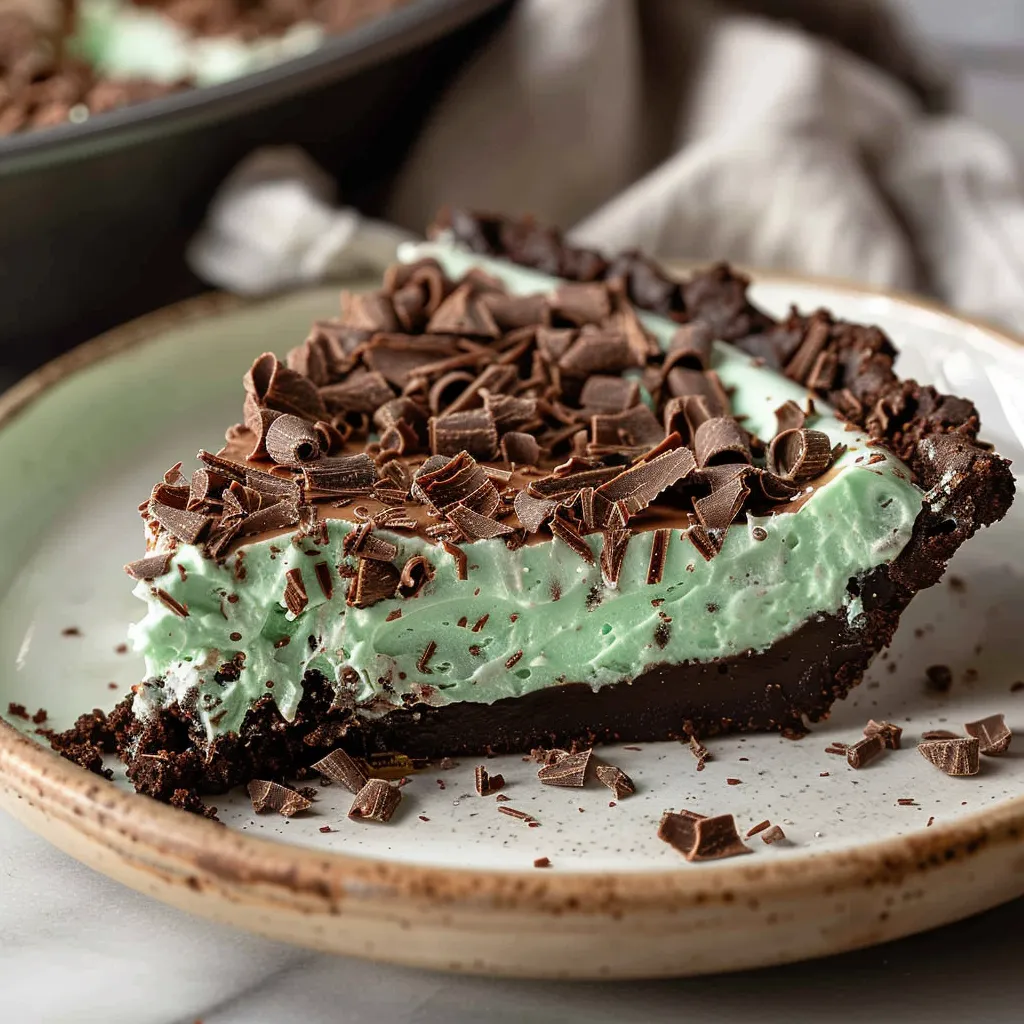
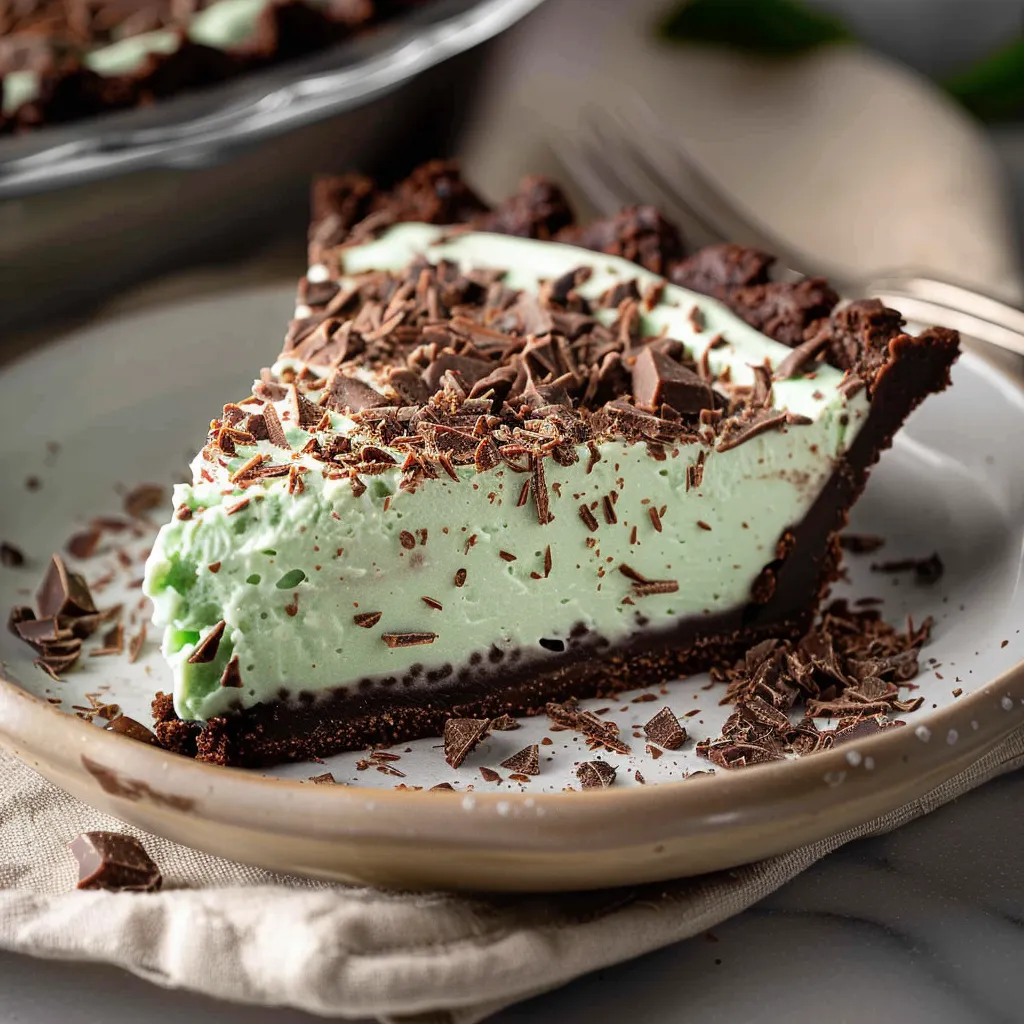
As you delve into a slice of this chocolate mint pie, get ready for your taste buds to take a delightful ride. Picture this: a rich, velvety chocolate filling that melts in your mouth, perfectly balanced by the coolness of mint that dances on your tongue. It’s like that first warm bite after a long day, the kind that makes you sigh with satisfaction. The buttery, flaky crust adds a comforting crunch that harmonizes beautifully with the creamy filling. Each bite feels indulgent and light at the same time, sort of like enjoying a decadent treat without the weight of heaviness. Trust me on this one—the combination of chocolate and mint is simply euphoric!
Ingredients You’ll Need
- Chocolate Graham Cracker Crust (1 pre-made or home-made): Provides a sweet, chocolatey base that complements the filling perfectly.
- Heavy Whipping Cream (1 cup): Adds richness and helps create that luscious filling.
- Cream Cheese (8 oz, softened): Gives the filling a smooth, creamy texture.
- Powdered Sugar (1 cup): Brings sweetness without the grit, making the filling light and fluffy.
- Unsweetened Cocoa Powder (1/2 cup): Deepens the chocolate flavor, making each bite rich and decadent.
- Mint Extract (1 teaspoon): This is key for that refreshing mint flavor—don’t skimp on it!
- Green Food Coloring (optional): A drop or two can add some extra charm to your filling, making it visually delightful.
- Chocolate Shavings or Mint Leaves (for garnish): These enhance the presentation and add a touch of elegance to your pie.
Optional Additions: Want to mix things up? Consider adding a layer of crushed Oreos in the crust or swirling in some crushed peppermint candies for a fun, festive twist!
Special Garnishes: A dollop of whipped cream, a sprinkle of cocoa powder, or even fresh mint leaves can take your presentation to the next level!
Step-by-Step Instructions
Are you ready to make some pie magic? Let’s get started!
- Prepare the Crust: If you’re using a pre-made chocolate graham cracker crust, just set it aside. If you’re making your own, crush about 2 cups of chocolate graham crackers, mix them with 1/2 cup of melted butter, and press it into a pie dish. Bake at 350°F (175°C) for about 10 minutes, then allow it to cool.
- Prepare the Filling: In a medium bowl, beat the softened cream cheese until smooth. Gradually add in the powdered sugar, mixing until well combined.
- Whip the Cream: In a separate bowl, whip the heavy cream until it forms stiff peaks. Fold half of this whipped cream into the cream cheese mixture, being gentle to maintain that fluffiness!
- Add Chocolate and Mint: Sift in the cocoa powder and pour in that mint extract. If you’re using food coloring, add a few drops now. Fold in the rest of the whipped cream until everything is just combined—don’t overmix!
- Fill the Crust: Spoon the luscious mixture into your cooled crust, smoothing the top with a spatula.
- Chill: Cover the pie with plastic wrap and refrigerate for at least 4 hours or overnight if you can wait. The longer it chills, the better the flavors meld!
That’s it—pretty easy, right? Just a few simple steps to a beautiful pie!
Serving & Storage Tips
When it’s time to serve, slice that pie with a sharp knife to get perfect pieces. You can drizzle some chocolate sauce over the top for extra flair, and don’t forget those garnishes! For leftovers—if there are any—cover the pie with plastic wrap or transfer slices to an airtight container. It keeps well in the refrigerator for about 3-5 days. You can also freeze individual slices for those moments when you want a sweet pick-me-up! Just remember to let it thaw in the fridge before devouring.
Helpful Tips
Now, let’s talk about a few tips so your pie turns out absolutely perfect! I remember burning the first batch of my graham cracker crust—learn from my mistake! Keep an eye on it, as oven temperatures can vary. If you want to make it a bit more decadent, try mixing in some mini chocolate chips with the filling for added texture. And trust me, don’t rush the chilling step! That’s where the magic happens, and the flavors get their chance to mingle beautifully.
Special Equipment
- Stand Mixer or Hand Mixer: This makes whipping cream and mixing your filling a breeze, getting it nice and fluffy.
- Pie Dish: A good pie dish is key to shaping your crust properly—trust me, it’s worth investing in one!
- Offset Spatula: Great for smoothing out the filling and ensuring it looks pretty when it’s time to serve.
Can I use a different type of crust?
Absolutely! If you prefer, you can use a traditional pie crust or even a gluten-free alternative. Just keep in mind that the flavor profile will change a bit, but it’ll still be delicious!
What if I’m not a fan of mint?
No worries! You can either skip the mint entirely or substitute it with a flavor you love—like orange or raspberry for a fruity twist!
How do I know when the pie is ready to serve?
Once it’s set in the fridge for at least four hours, it should hold its shape when sliced. It should feel firm but soft when you take a bite.
Can I make this pie ahead of time?
You bet! This pie is perfect for making ahead. Just ensure it’s covered well in the fridge, and it’ll be waiting for you when you’re ready to enjoy it!
What’s the best way to cut the pie?
Use a warm knife (just run it under hot water) to slice through the silky filling. It’ll help you get clean cuts with minimal mess!
Conclusion
This Chocolate Mint Pie truly embodies cozy gatherings, sweet memories, and the joys of sharing something delightful with loved ones. Whether it’s the first slice of a summer barbecue or a comforting dessert for a quiet evening at home, it invites smiles and joy to the table. I can’t wait for you to try it! Remember to come back and share your experience in the comments—what tweaks did you make? No matter what, I hope this pie becomes a cherished recipe in your home too. Enjoy every delicious bite!
Print
Decadent Chocolate Mint Pie A Rich and Refreshing Delight
Savor the rich refreshing flavors of this Chocolate Mint Pie Perfect for gatherings or weeknights Try it today for a delightful chocolate experience
- Total Time: 4 hours 30 minutes
- Yield: 8 servings 1x
Ingredients
Instructions
Notes
This Chocolate Mint Pie is a delightful blend of rich chocolate and refreshing mint, perfect for any occasion. It’s easy to make and incredibly delicious!
- Prep Time: 20 minutes
- Cook Time: 10 minutes
- Category: Dessert
- Cuisine: American
Nutrition
- Serving Size: 8 servings
- Calories: 350
- Sugar: 20g
- Fat: 25g
- Carbohydrates: 30g
- Fiber: 2g
- Protein: 5g
Keywords: Chocolate Mint Pie, dessert, no-bake pie, easy dessert, chocolate dessert


