There’s something magical about the scent of rice sizzling on the grill, and for me, that memory conjures up blissful summer evenings spent by the hazy sunset with family. My grandma would whip up yaki onigiri—a simple but heartwarming staple of Japanese cuisine—transforming leftover rice into crispy, savory morsels. As the golden crust formed, laughter and stories would fill the air, making that moment feel like the coziest hug. For me, yaki onigiri is more than just food; it’s a delicious fragment of nostalgia. It embodies warmth, care, and, best of all, it’s incredibly easy to make. So let’s dive into this recipe that perfectly balances simplicity with delight.
Why You’ll Love This Recipe
If you’ve ever craved comfort food that doesn’t take hours to prepare, yaki onigiri is your answer! They’re perfect as a snack, a side dish, or even the star of a quick meal. You can whip them up in no time with just a few ingredients, and their crispy exterior gives way to a soft, fluffy interior that will have you coming back for more—trust me on this one! Plus, you can flavor them however you want, whether you stick to the traditional or get a little adventurous. They’re truly versatile and utterly satisfying!
What It Tastes Like
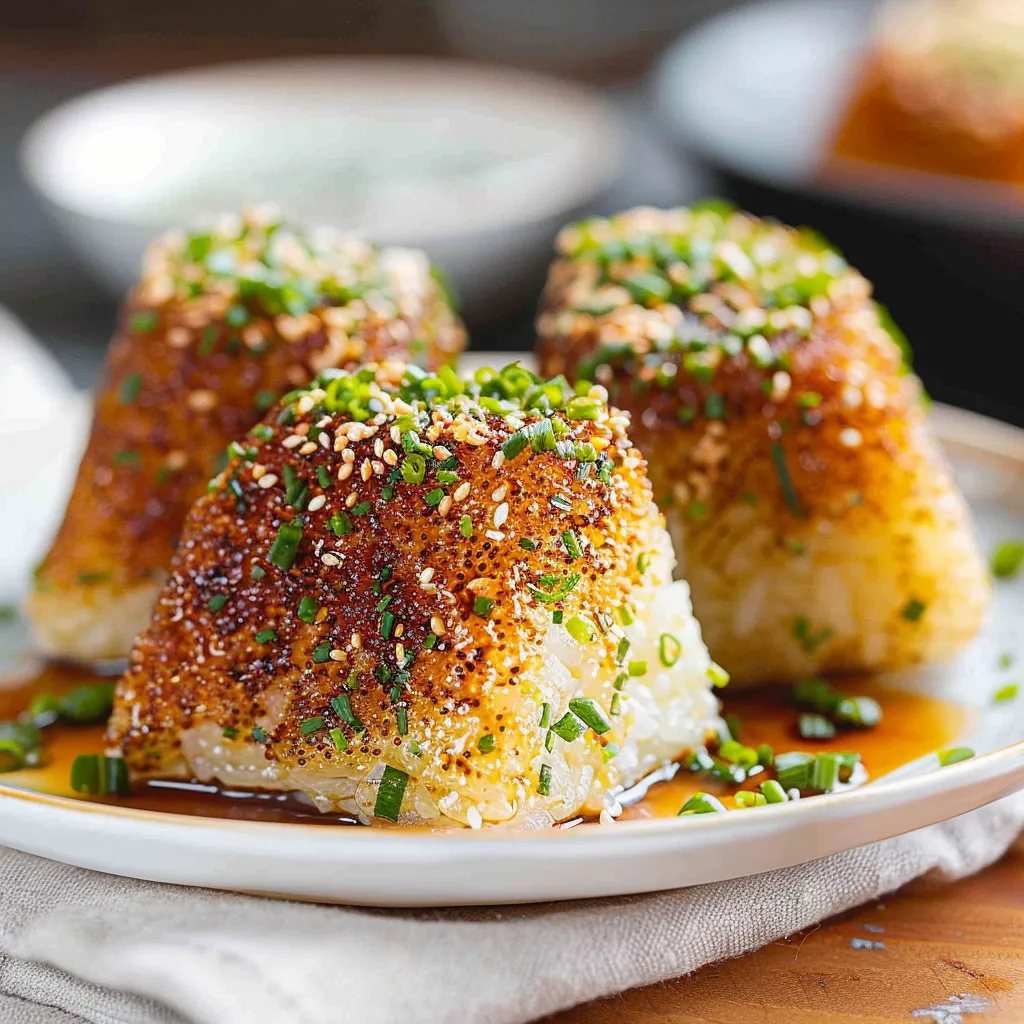
Let’s talk about flavors and textures—oh my! Each bite of yaki onigiri delivers a satisfying crunch, while the inside is comforting and nutty, much like a warm embrace after a long day. A hint of soy sauce adds a savory depth, balancing beautifully with the rice’s sweetness. Honestly, it’s like a hug from your favorite person; warm and full of familiarity. And if you choose to stuff them with fillings like grilled salmon or a sprinkle of furikake—the taste journey just gets better. Imagine that warm, cozy bite while embracing the delightful kiss of smokiness from grilling; it’s a sensory hug for your tastebuds.
Ingredients You’ll Need
- 2 cups cooked sushi or short-grain rice: The star of the dish—sticky and perfect for shaping.
- 1 tablespoon soy sauce: Adds salty umami flavor that enhances the rice.
- 1 teaspoon sesame oil: For a nutty aroma that gives depth to the onigiri.
- Optional Fillings (such as grilled salmon, pickled plum, or your choice): These create delightful surprises inside each bite.
- 1 tablespoon miso paste (optional): For an umami kick when mixed into the rice.
Optional Additions: Get creative! Try adding cooked chopped vegetables or even a dash of chili flakes for a little heat. And here’s a fun tip: ever tried it with cinnamon? You should.
Special Garnishes: A sprinkle of toasted sesame seeds or finely sliced green onions can add a professional touch.

Step-by-Step Instructions
- Combine your rice ingredients: In a large mixing bowl, combine the cooked rice, soy sauce, and sesame oil. If you’re feeling adventurous, mix in miso paste for added flavor.
- Form the onigiri: Wet your hands slightly to prevent sticking and grab about 1/4 cup of the rice mixture. Gently mold it into a triangular shape, roughly forming a small pyramid—don’t squeeze too hard; you don’t want to break the rice grains!
- Grill time: Preheat a grill or a non-stick skillet over medium heat. Lightly toast each side of the onigiri for about 3–4 minutes, until golden brown and crispy. Flip carefully to avoid breaking them.
- Optional flavoring: Brush on a bit more soy sauce while grilling for extra flavor—just don’t let it burn!
- Serve warm: Enjoy your delicious yaki onigiri right away, while the crispy exterior and soft interior are at their very best. That’s it—pretty easy, right?
Recipe Variations
Want to spice things up a bit? You can swap the typical fillings for your favorite ingredients! Try incorporating spicy tuna, sautéed mushrooms, or even roasted vegetables for a vegetarian twist. For a fun presentation at gatherings, consider making mini onigiri bites or using cookie cutters to create fun shapes. Kids love that!
Serving & Storage Tips
When serving yaki onigiri, arrange them beautifully on a platter with a sprinkle of sesame seeds or sliced scallions for color and flavor. They can be served plain or drizzled with a little extra soy sauce for dipping.
If you have leftovers (though they might not last long), store them in an airtight container in the fridge for a day or two. Reheating in a skillet slightly will help restore that lovely crunch! I usually pop them back on the grill just for a couple of minutes—it’s totally worth it.

Helpful Tips
Let’s make sure you nail this recipe! Here are a few insights I’ve learned along the way:
- Don’t skip the soaking: When shaping the onigiri, wetting your hands will help prevent the rice from sticking. It’s essential and makes everything easier.
- Experiment: Play with different fillings and toppings! I remember burning the first batch of onigiri because I got distracted—so keep an eye on them!
- Use day-old rice: It seems silly, but leftover rice works wonders here! Freshly made rice can be too soft.
Special Equipment
No fancy gadgets are necessary, but here are some tools that can make the process smoother:
- Rice cooker: For perfectly cooked sushi rice, a rice cooker saves time and takes the guesswork out of cooking.
- Non-stick skillet or grill pan: This is key to getting that beautiful golden crust without sticking or burning.
- Onigiri mold (optional): If you want perfectly shaped onigiri, a mold can make it a breeze—though your hands are just fine!
Frequently Asked Questions
Can I use brown rice instead of white rice?
Absolutely! Just keep in mind that the texture will be a bit different, but it will still taste great! You may need to adjust the cooking time as well.
Can I freeze yaki onigiri?
Yes! They freeze really well. Be sure to wrap each onigiri in plastic wrap before placing them in a freezer bag. Just remember to enjoy them within a couple of months!
Are there gluten-free options for soy sauce?
Sure thing! Look for tamari, which is a gluten-free soy sauce, and you can still enjoy that savory depth without the gluten.
What’s the best way to reheat leftover onigiri?
To keep the texture intact, reheat on a skillet over medium heat until heated through. You could also wrap them in aluminum foil and pop them in the oven for a few minutes!
Conclusion
So there you have it—yaki onigiri: crispy, comforting little bites that are endlessly customizable! Whether you’re reminiscing over cherished family moments or sharing them with loved ones, this dish is sure to become a favorite in your kitchen. Give it a go, and let me know how yours turn out in the comments! I can’t wait to hear about your filling adventures!
Until then, happy cooking! And remember, just like my grandmother used to say, “Food made with love has a flavor like no other.”
Print
Savor the Taste of Homemade Yaki Onigiri: A Quick Delight
Discover the savory simplicity of homemade Yaki Onigiri. This quick recipe is perfect for weeknights. Try it today for a delightful meal!
- Total Time: 25 minutes
- Yield: 4 servings 1x
Ingredients
Instructions
Notes
Yaki onigiri is a simple yet heartwarming staple of Japanese cuisine, transforming leftover rice into crispy, savory morsels that embody warmth and nostalgia.
- Prep Time: 10 minutes
- Cook Time: 15 minutes
- Category: Snack
- Cuisine: Japanese
Nutrition
- Serving Size: 4 servings
- Calories: 250
- Sugar: 1g
- Fat: 8g
- Carbohydrates: 40g
- Fiber: 1g
- Protein: 5g
Keywords: Yaki Onigiri, Japanese cuisine, comfort food, rice recipe, easy recipes, snacks, vegetarian


