
When I think of cozy evenings in the kitchen, one particular memory floats to the surface like a leaf on a still pond. Picture this: the rhythmic sound of a knife chopping through vegetables, the sizzle of meat hitting a hot pan, and the divine aroma of fried goodness wafting through the air. This was my introduction to Japanese Katsu Bowls, inspired by my travels to Japan and the warm hospitality of friends who introduced me to this delightful dish. These bowls are more than just a meal; they carry nostalgia, warmth, and a sense of comfort that keeps you coming back for more. The crispiness of the katsu combined with the embracing warmth of rice and savory sauces makes it a dish I can never resist.
Why You’ll Love This Recipe
If you’re looking for a dish that’s quick to whip up yet feels oh-so-special, you’ve hit the jackpot with these Katsu Bowls. Imagine serving something that wows your family and friends while barely breaking a sweat! The beauty of this recipe lies in its simplicity — juicy panko-crusted chicken or pork nestled atop fluffy rice, drizzled with a rich sauce, and garnished with fresh veggies. It’s perfect for busy weeknights or laid-back weekends when you want something comforting without spending hours in the kitchen.
What It Tastes Like
Oh, where do I begin? One bite of a Katsu Bowl, and you’re enveloped in a delightful contrast of textures and flavors. The outside is crispy, golden, and satisfying, like the moment you step into a sun-drenched afternoon. The meat is tender and juicy, offering a savory depth that sings with each bite. And the rice, fluffy and warm, hugs the savory components like an old friend. Drizzle on some tangy sauce — it’s like a gentle, flavorful kiss on top. You might even find yourself standing over the kitchen counter, savoring every last morsel.
Ingredients You’ll Need
- Chicken cutlets or pork chops (1 lb): Juicy protein that serves as the star of the show.
- Panko breadcrumbs (1 cup): These give your katsu that perfect crispy exterior.
- Egg (1, beaten): Helps the breadcrumbs adhere while adding richness.
- All-purpose flour (1 cup): Assists in the breading process for that crispy crunch.
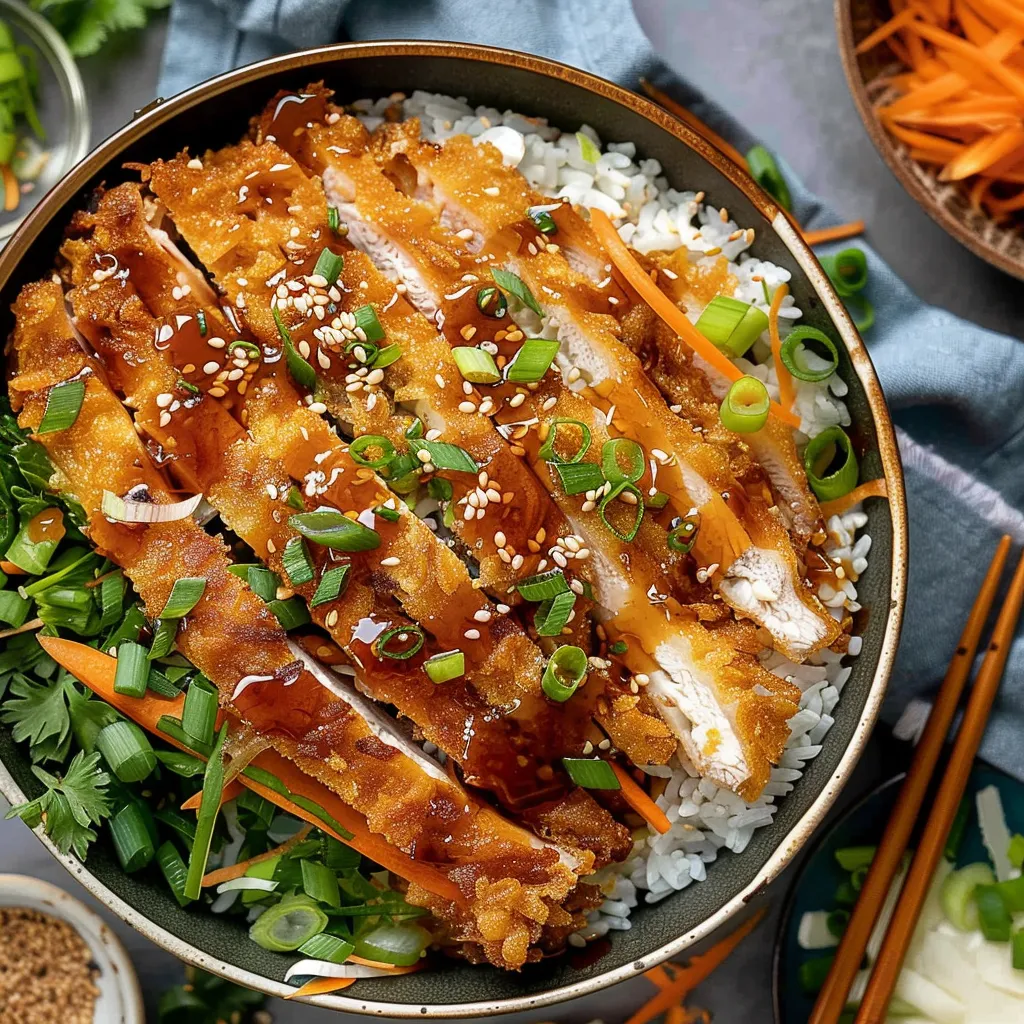
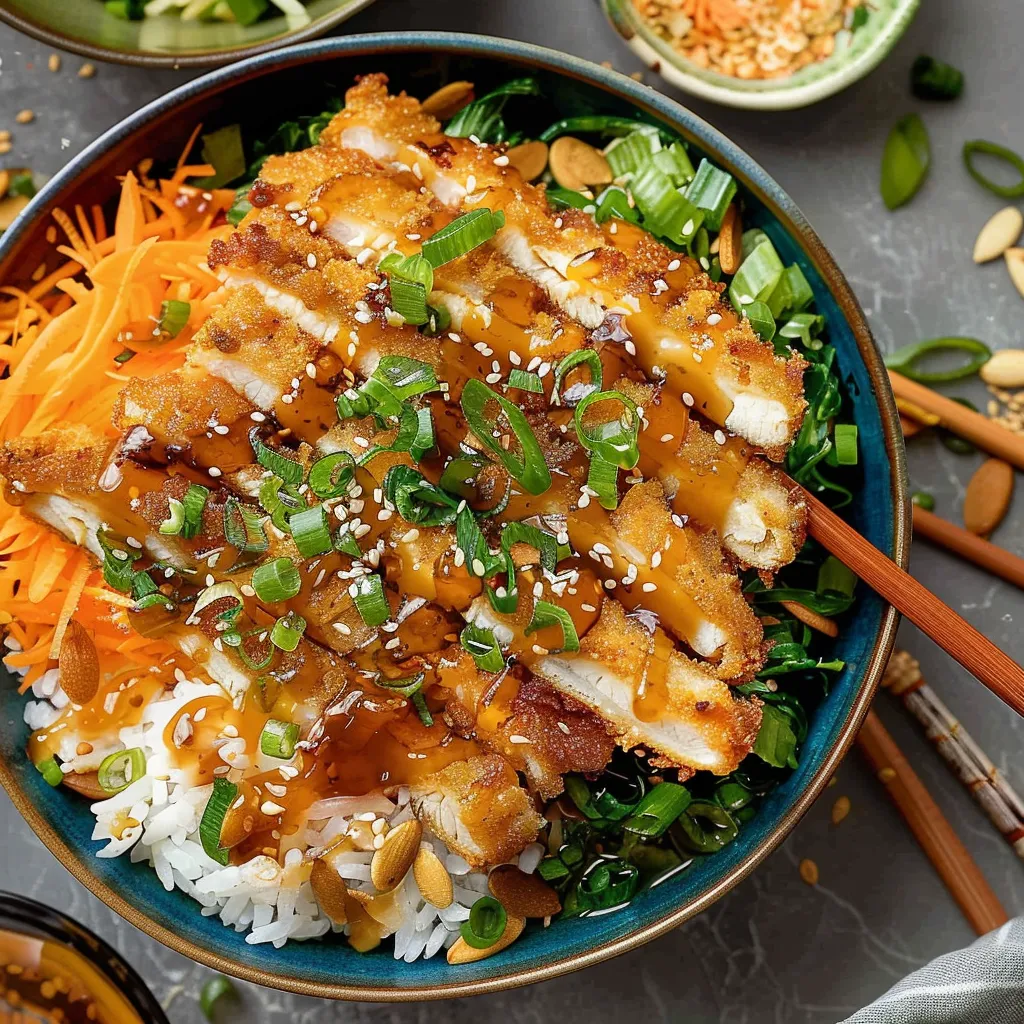
- Cooked rice (4 cups): Fluffy and warm, it’s the comforting base of your bowl.
- Tonikatsu sauce (1/2 cup): A bit sweet, a bit tangy — it ties everything together.
- Vegetables (e.g., shredded cabbage, cucumber, carrots): Adds freshness and crunch to each bite.
- Green onions: For garnish and a touch of brightness!
Optional Additions: Feel free to add a soft-boiled egg, sliced avocado, or a sprinkle of sesame seeds for an extra flair.
Special Garnishes: A few thin slices of pickled ginger or a sprinkle of furikake can elevate the presentation beautifully.
Step-by-Step Instructions
Let’s get to the good part — cooking! This is where the magic happens, so roll up your sleeves and let’s dive in!
- Prepare your workstations: Set up three shallow bowls: one with flour, one with the beaten egg, and one with panko breadcrumbs.
- Prep the meat: Season your chicken or pork with salt and pepper. Dredge it in the flour, shaking off any excess, then dip it in the egg, and finally coat it in the panko. Make sure each cutlet is well-covered — that’s key for crispy goodness!
- Fry it up: In a large skillet over medium heat, add vegetable oil until it’s about 1/4 inch deep. Once hot, gently place the cutlets in the skillet. Fry for about 4-5 minutes on each side until golden and cooked through. You might have to do this in batches, but trust me — it’s worth it!
- Let it rest: After frying, place your katsu on a paper towel-lined plate to absorb excess oil. A little resting time makes it extra crispy.
- Assemble the bowls: In each bowl, add a generous scoop of warm rice, place your crispy katsu on top, and drizzle with tonkatsu sauce. Add your veggies in a colorful arrangement, top with green onions, and any optional garnishes!
That’s it — pretty easy, right? You’ve just created a delicious Katsu Bowl that’s bound to impress!
Recipe Variations
Want to switch things up? Try using different proteins like tofu for a vegetarian twist or switch to shrimp for something a bit more adventurous. You could also experiment with flavors by using spicy mayo instead of tonkatsu sauce or adding fresh herbs like cilantro for a zing. The possibilities are endless, and that’s part of the fun!
Serving & Storage Tips
When serving, I love to arrange everything artfully in the bowl, creating a feast for the eyes as well as the tongue. If you have leftovers (which, let’s be honest, is a rarity with this dish), store them in an airtight container in the fridge for up to 3 days. When reheating, a quick pan-fry brings back some of that glorious crispiness. Or, if you’re in a hurry, the microwave works too — just cover it with a damp paper towel to keep it moist.
Helpful Tips
Here’s the funny part: I used to think the frying process had to be complicated. But I learned that the oil must be hot enough before adding the cutlets; otherwise, they can turn out soggy instead of crisp. And remember not to overcrowd the pan! Fry in batches for perfect results. Freshly grated ginger in your sauce can give it an extra dimension, and don’t skimp on the seasoning — it genuinely makes a difference.
Special Equipment
- Heavy-bottomed skillet: Essential for even heat distribution while frying.
- Meat tenderizer: Helps achieve an even thickness for perfect cooking.
- Shallow bowls: They make the breading process so much easier and neater.
- Instant-read thermometer: This is completely optional but honestly quite handy to check the doneness of your meat — it should reach about 165°F.
Can I use other types of meat for Katsu?
Absolutely! While chicken and pork are traditional, you can also use beef, lamb, or even tofu for a vegetarian twist. Just adjust the cooking time depending on the protein.
What side dishes go well with Katsu Bowls?
Pair your Katsu Bowls with miso soup, pickled vegetables, or a side salad with a light sesame dressing. You’ll have a complete and balanced meal!
How do I make a homemade tonkatsu sauce?
It’s simple! Just mix equal parts ketchup and Worcestershire sauce, add a dash of soy sauce and a sprinkle of sugar. You can adjust the proportions to your liking for sweetness or tanginess.
Can I make these bowls ahead of time?
Definitely! You can prepare the katsu in advance and reheat it before serving. Just be sure to store the sauce and vegetables separately until you’re ready to assemble your bowls.
Conclusion
So, there you have it — your journey into the delightful world of Japanese Katsu Bowls! It’s warm, comforting, and truly a dish that feels like a hug on a plate. I can’t wait for you to try it and hope it brings you that same cozy feeling that it brings me. Remember to play around with the ingredients and make it your own. If you try it, come back here and let me know how it turned out in the comments. Happy cooking!
Print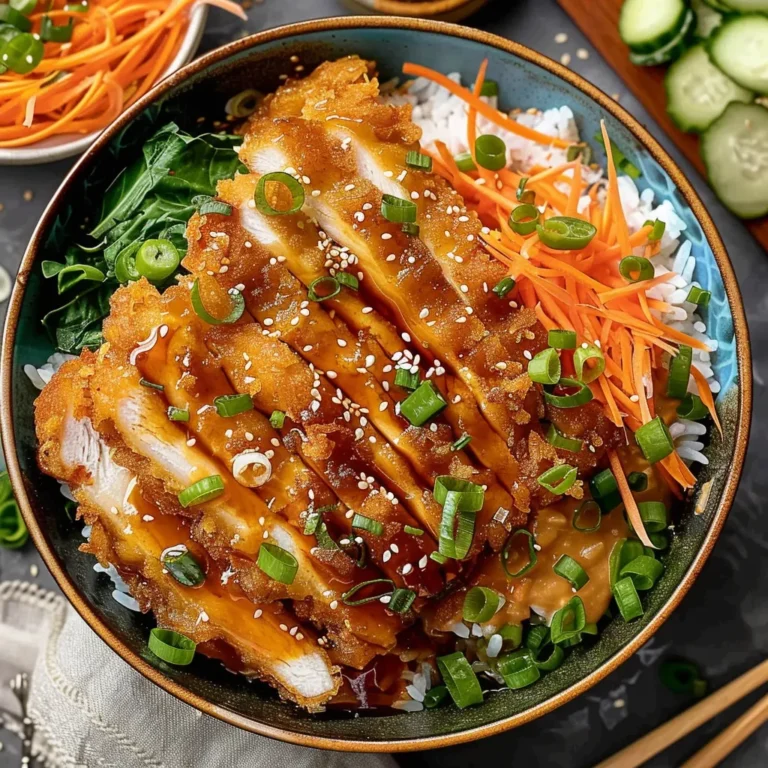
Savor Delicious Japanese Katsu Bowls: Easy Homemade Recipe
Discover the deliciousness of Japanese Katsu Bowls with this easy homemade recipe. Perfect for weeknights—try it today for a taste of Japan!
- Total Time: 35 minutes
- Yield: 4 servings 1x
Ingredients
Instructions
Notes
Delicious and comforting Japanese Katsu Bowls featuring crispy panko-crusted chicken or pork served over fluffy rice with rich tonkatsu sauce and fresh veggies.
- Prep Time: 20 minutes
- Cook Time: 15 minutes
- Category: Dinner
- Cuisine: Japanese
Nutrition
- Serving Size: 4 servings
- Calories: 650
- Sugar: 5g
- Fat: 25g
- Carbohydrates: 70g
- Fiber: 3g
- Protein: 30g
Keywords: Katsu Bowl, Japanese cuisine, comfort food, easy recipe, panko chicken, quick dinner, savory dish


