
As the days grow longer and the sun dips lower in the sky, there’s a certain magic in the air that signals Easter is just around the corner. For me, this time of year always reminds me of my childhood — the vibrant colors of spring blossoming around us, the scent of freshly baked goodies wafting through the house, and the excitement of hunting for chocolate eggs hidden in the garden. One Easter tradition that seems to stick with me is the delightful sweetness of cheesecake, but let’s face it — during this busy time, who really wants to turn on the oven? That’s where my Easter No-Bake Mini Egg Cheesecake comes in. It’s creamy, dreamy, and easier to whip up than you might think!
So if you’re ready to impress your loved ones without breaking a sweat in the kitchen, grab a chair and a cup of coffee — let’s dive into this delightful recipe together!
Why You’ll Love This Recipe
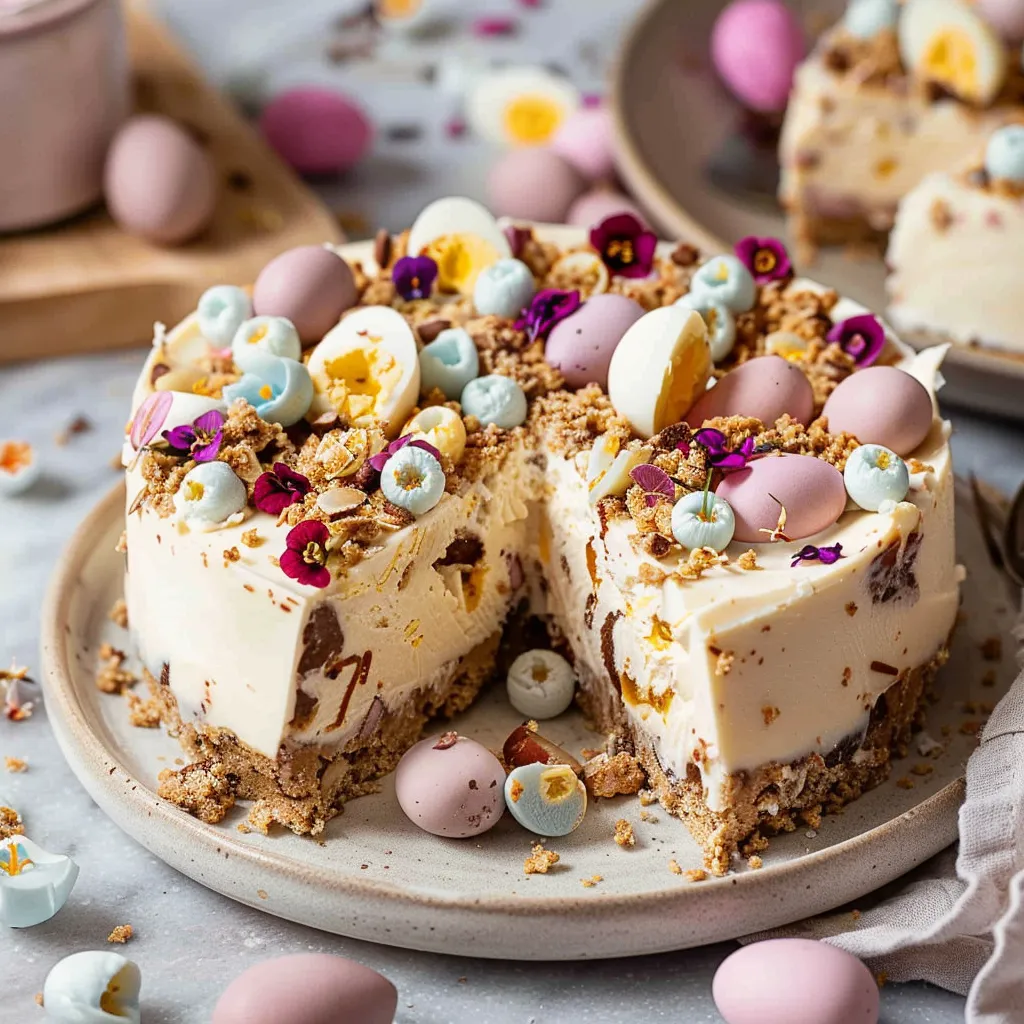
This no-bake cheesecake isn’t just easy to make; it’s such a crowd-pleaser! Imagine a rich, creamy cheesecake filling bursting with the flavors of mini chocolate eggs all atop a buttery, crumbly crust. It’s a dessert that celebrates the whimsy of Easter without the fuss of baking. Whether you’re hosting a family gathering or simply treating yourself, this cheesecake can be prepped in under half an hour. A quick chill in the fridge, and voila — you have a beautiful dessert that’s both indulgent and fun! Trust me, you’ll be hearing people say, “I can’t believe you made this!” every time you serve it.
What It Tastes Like
Picture this: you take your first bite and it’s like diving into a cloud of smooth creaminess with a hint of tangy cheesiness from the cream cheese and sour cream, perfectly balanced with the sweetness of sugar and topped off with the crunch of chocolate eggs. It’s light yet satisfying, with a crust that crumbles delightfully beneath your fork. If you’ve ever savored the experience of enjoying chocolate eggs in Easter past, this cheesecake brings that nostalgic essence right to your plate!
Ingredients You’ll Need
- For the Crust:
- 1 ½ cups graham cracker crumbs — Adds a perfect buttery base.
- ⅓ cup granulated sugar — Sweetens the crust just right.
- ½ cup unsalted butter, melted — Brings everything together for that crumbly goodness.
- For the Cheesecake Filling:
- 16 oz cream cheese, softened — The heart of any good cheesecake, rich and creamy.
- ½ cup powdered sugar — To sweeten and give a smooth texture.
- 1 cup sour cream — Adds a delightful tanginess that balances the sweetness.
- 1 tsp vanilla extract — For a hint of warmth and depth.
- 1 cup mini chocolate eggs, chopped — Those sweet, crunchy bursts of chocolate!
Optional Additions: If you want to give it your own twist, consider adding a splash of almond extract for a subtle nuttiness or some lemon zest to brighten it up.
Special Garnishes: Top your cheesecake with whipped cream, a sprinkle of mini eggs, or even chocolate shavings for an extra special touch that makes it pop visually!
Step-by-Step Instructions
Now, let’s get into this simple process. It’s so easy; you might just find yourself making this cheesecake for every occasion!
- Make the Crust: In a mixing bowl, combine graham cracker crumbs, granulated sugar, and melted butter. Mix until well combined — it should resemble wet sand. Press the mixture firmly into the bottom of a 9-inch springform pan. Make sure to pack it tightly! Set aside.
- Prepare the Filling: In a large bowl, beat the softened cream cheese and powdered sugar together until smooth and fluffy. This can take about 2-3 minutes, so don’t rush it! Add in the sour cream and vanilla extract, mixing until everything is perfect — you want a creamy consistency. Remember, this step is where the magic happens!
- Incorporate Chocolate Eggs: Gently fold in the chopped mini chocolate eggs. It’s a good idea to keep a few for garnishing later if you like.
- Assemble the Cheesecake: Pour the cheesecake filling into the prepared crust, smoothing the top with a spatula. Don’t worry if it’s not perfect — this isn’t about perfection; it’s about deliciousness!
- Chill: Cover and refrigerate the cheesecake for at least 4 hours, or even better, overnight. Patience is key here — the longer it sets, the better it will taste!
That’s it — pretty easy, right? Now you just have to wait for the magic to happen in the fridge!
Recipe Variations
Feel like changing things up? No problem! Swap the graham crackers for chocolate cookies to give your crust a deeper flavor. Or how about trying raspberry or strawberry puree in the filling? Trust me, those fruity flavors mesh beautifully with the creaminess. For the chocolate egg lovers, incorporate mini peanut butter eggs into the mix for a fun surprise!
Serving & Storage Tips
Once your cheesecake has set, it’s time to slice and serve! To make it look extra fancy, use a warm knife (just dip it in hot water and dry it off) for clean edges. If you have any leftovers (which is rare!), cover the cheesecake tightly with plastic wrap or aluminum foil. It can be stored in the fridge for up to 4 days. Just a heads up — it tastes even better the next day as the flavors meld together!
Helpful Tips
A few pointers from my own kitchen adventures: don’t rush the mixing of the filling. It really makes a difference in achieving that silky texture. And please learn from my mistake — I once forgot to soften the cream cheese and ended up with lumps that took forever to fix. So, let it sit at room temperature for about 30 minutes before starting. Finally, remember to pat the crust firmly; a crumbly crust just won’t do!
Special Equipment
- Springform Pan: Essential for easy removal and presentation. It allows you to hold the perfect shape without fussing over breaking your precious cheesecake.
- Hand Mixer or Stand Mixer: A must for achieving that smooth, creamy filling. You could use a whisk, but it’ll take a bit longer, and we are all about easy, remember?
Frequently Asked Questions
Can I use a different type of cookie for the crust?
Absolutely! Feel free to use chocolate cookies or even vanilla wafers for a different flavor profile. Just crush them up the same way!
How do I know when the cheesecake is set?
It should be firm to the touch but still have a slight jiggle in the center. If it looks too wobbly, give it a couple more hours in the fridge.
Can I freeze the mini cheesecakes?
Yes, you can freeze them! Just make sure to wrap them tightly with plastic wrap and aluminum foil. They should be good for up to a month. Let them thaw in the fridge before serving.
What should I garnish it with?
You can never go wrong with whipped cream and mini chocolate eggs. Consider fresh berries or even drizzles of chocolate sauce for a little flair!
Conclusion
If you ask me, there’s something so heartwarming about sharing treats that remind us of special moments, and this Easter No-Bake Mini Egg Cheesecake does precisely that. It’s a dessert that fuses nostalgia with celebration, and I promise you — the joy it brings is just as sweet as the taste! So why not gather your loved ones, whip up this easy cheesecake, and savor those delightful bites together? I can’t wait to hear about your own experiences with it — feel free to drop a note in the comments and share your thoughts. Happy baking (or should I say mixing?), friends!
Print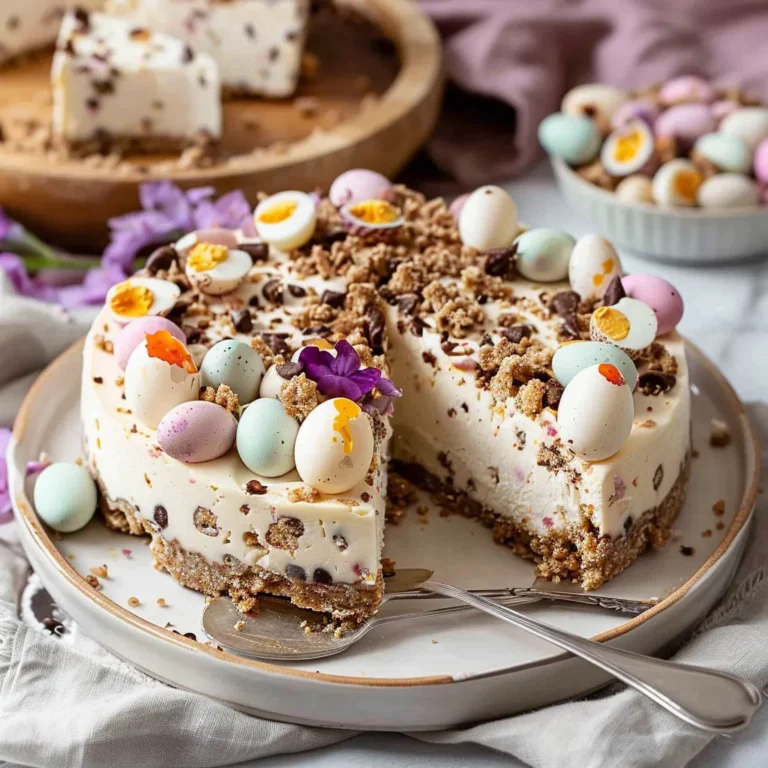
Easter No-Bake Mini Egg Cheesecake
Celebrate Easter with this No-Bake Mini Egg Cheesecake, featuring creamy layers and crunchy chocolate eggs. Perfect for festive gatherings—try it today!
- Total Time: 4 hours 30 minutes
- Yield: 8 servings 1x
Ingredients
Instructions
Notes
This Easter No-Bake Mini Egg Cheesecake is creamy, dreamy, and perfect for spring celebrations. It’s easy to make and a crowd-pleaser!
- Prep Time: 30 minutes
- Category: Dessert
- Cuisine: American
Nutrition
- Serving Size: 8 servings
- Calories: 300
- Sugar: 15g
- Fat: 20g
- Carbohydrates: 30g
- Fiber: 1g
- Protein: 5g
Keywords: Easter cheesecake, no-bake cheesecake, mini egg cheesecake, dessert recipe, spring dessert


