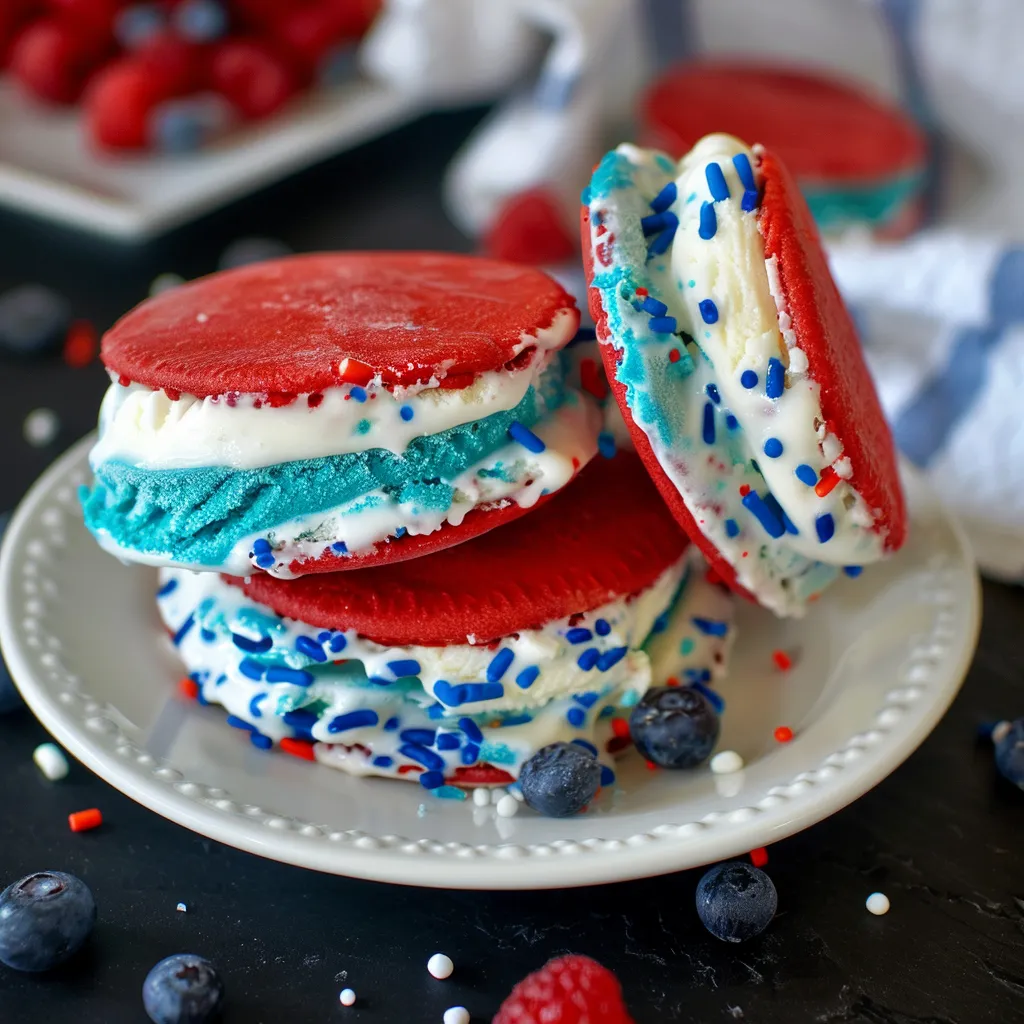
There’s a special magic in summer evenings, isn’t there? As the sun dips below the horizon, casting a golden glow over everything, it’s hard not to feel nostalgic. I remember backyard cookouts with my family, where laughter mingled with the scent of grilled burgers and the joyous sounds of kids splashing in the pool. And of course, no summer gathering felt complete without a sweet treat to cool us off. That’s where these Red, White & Blue Ice Cream Sandwiches come in—a playful take on a classic favorite, bursting with summer vibes and colors that mirror the American flag. They’re not only a nod to festive gatherings but also a fantastic dessert that’s ridiculously easy to whip up and share with loved ones.
Why You’ll Love This Recipe
Honestly, what’s not to love about ice cream sandwiches? They’re the epitome of summer fun—the perfect combination of creamy, cold ice cream tucked between two soft cookie layers. This recipe is quick enough to make on a whim, yet it impresses just about everyone. They’re great for a crowd, suitable for little hands, and fun to customize, which means you can mix and match flavors to suit every palate. Plus, you get to experience that delightful contrast of textures: the chewy cookie meets the velvety ice cream—trust me, your taste buds will thank you!
What It Tastes Like
Imagine sinking your teeth into a colorful treat, where the creamy vanilla ice cream slowly melts into the warm, soft edges of the cookie. The first bite feels heavenly—a delightful contrast of crispy on the edges and chewy in the center, wrapped around a cool, sweet filling that dances on your tongue. And let’s not forget those bites that are a little messier; ice cream dribbling down your fingers as you laugh with your friends or family… it’s pure bliss. Each mouthful is reminiscent of summer days, joyfully spent, celebrating life under the sun.
Ingredients You’ll Need
Gathering your ingredients is half the fun! Here’s what you’ll need to create your Red, White & Blue Ice Cream Sandwiches:
- For the Cookies:
- 2 cups all-purpose flour: Gives your cookies the perfect structure.
- 1 teaspoon baking soda: Helps the cookies puff up just right.
- 1/2 teaspoon salt: Enhances the flavors of the cookies.
- 1 cup unsalted butter, softened: Creates that rich, buttery taste.
- 1 cup granulated sugar: Sweetens the dough perfectly.
- 1 cup packed brown sugar: Adds moisture and a hint of caramel flavor.
- 2 large eggs: Binds everything together.
- 2 teaspoons vanilla extract: The secret to great flavor.
- 2 cups semi-sweet chocolate chips: For that delightful chocolatey burst.
- For the Ice Cream:
- 4 cups vanilla ice cream (or your favorite flavor): The creamy filling that brings it all together.
- Optional Additions: You could fold in crushed strawberries and blueberries for added fruitiness or use different flavor ice creams like cookies and cream or mint chocolate chip.
Special Garnishes: Consider rolling the edges in colorful sprinkles or crushed nuts for that perfect finish. These little details make such a difference when it comes to presentation.
Step-by-Step Instructions
Let’s get down to the fun part—making these delightful treats! Just follow these simple steps:
- Preheat your oven to 350°F (175°C). This part is essential—don’t skip it!
- In a large bowl, whisk together the flour, baking soda, and salt—this helps distribute the baking soda evenly.
- In another bowl, cream together the softened butter, granulated sugar, and brown sugar until light and fluffy—this should take about 2-3 minutes.
- Add the eggs, one at a time, and mix well after each addition. Stir in the vanilla extract. Now, here’s the funny part: sometimes I forget to add the eggs and wonder why my cookies are dense! Don’t make my mistake.
- Gradually beat in the dry ingredients until just combined; don’t overmix, or your cookies could turn tough!
- Fold in the chocolate chips gently, making sure they’re evenly distributed.
- Using a cookie scoop or tablespoon, drop dough onto a lined baking sheet, spacing them about 2 inches apart.
- Bake for 10-12 minutes, or until the edges are golden and the centers still look slightly soft. Trust me—pull them out a bit early; they’ll continue to firm up on the tray.
- Let the cookies cool on the baking sheet for 5 minutes before transferring them to wire racks to cool completely.
- Once the cookies are cool, take your vanilla ice cream and scoop a generous amount onto the bottom of one cookie. Top with another cookie and gently press together. Voila! You’ve got an ice cream sandwich!
Now, here’s a tip: wrap each sandwich in plastic wrap and freeze them for at least 2 hours before serving. This way, they hold their shape beautifully!
Recipe Variations
If you’re feeling adventurous, why not try a few custom variations? Consider using chocolate cookies instead of classic vanilla for a rich twist. You can also layer in fresh summer fruits like sliced strawberries or blueberries in between the cookies for an extra burst of flavor. And for a fun twist, try adding a scoop of raspberry sorbet in there for a delightful tartness that balances the sweetness!
Serving & Storage Tips
When it comes to serving, arrange your ice cream sandwiches on a platter, alternating colors if you’ve made variations. A drizzle of chocolate syrup on top makes them look even more enticing! To store leftovers, wrap sandwiches in plastic wrap and keep them in an airtight container in your freezer for up to a week. If they last that long—trust me, they’ll vanish quicker than you expect!
Helpful Tips
Over the years, I’ve learned a few tricks that can make your baking experience smoother:
- Always use softened butter—this helps your cookies get that nice chewy texture.
- Don’t overbake! Remember, the cookies will continue to cook on the baking sheet after you take them out of the oven.
- Mold your ice cream onto the cookies when they’re still slightly warm for a perfect, melty filling. But if it’s too warm, your ice cream will drip everywhere!
And let’s not forget: if you ever find yourself with broken cookie pieces, just use them as a crumble topping for ice cream sundaes. Waste not, want not!
Special Equipment
While you can make these delicious sandwiches with basic kitchen tools, a few handy items will make your life easier:
- Cookie Scoop: This handy tool allows you to evenly portion your dough, which means uniform cookies every time.
- Silicone Baking Mat: These are great for preventing cookies from sticking to the baking sheet, making cleanup a breeze.
- Wire Rack: A must for cooling baked goods properly, as it allows air to circulate around the cookies, preventing sogginess.
Frequently Asked Questions
Can I use gluten-free flour in this recipe?
Absolutely! Just be sure to use a gluten-free all-purpose flour blend for similar results. The textures may vary slightly, but they’ll still be delicious!
What if I don’t have chocolate chips?
No problem! You could substitute them with nuts or dried fruits, or even experiment with white chocolate or butterscotch chips if that strikes your fancy.
Can I make the cookies ahead of time?
Yes! You can bake the cookies up to a week in advance. Just store them in an airtight container at room temperature, and assemble the sandwiches the day you’re ready to serve them!
How do I prevent the ice cream from melting too fast when serving?
Keep your ice cream sandwiches in the freezer until just before serving. You can also serve them on chilled plates for extra insulation!
Can I freeze the prepared ice cream sandwiches?
Definitely! They freeze beautifully. Just make sure to wrap each sandwich tightly in plastic wrap or foil to avoid freezer burn.
Conclusion
So there you have it—your go-to recipe for Red, White & Blue Ice Cream Sandwiches, perfect for any summer gathering or just a cozy night in. These little beauties not only satisfy your sweet tooth but also evoke that nostalgic feeling of carefree summer days. I can’t wait for you to make these and share your experience! Do let me know how they turn out, or if you’ve tried any fun variations of your own. Happy summer baking, friends!
Print
Red, White & Blue Ice Cream Sandwiches
Savor the summer with these delightful Red, White & Blue Ice Cream Sandwiches! Perfect for fun gatherings, try this simple and tasty treat today!
- Total Time: 2 hours 30 minutes
- Yield: 12 sandwiches 1x
Ingredients
Instructions
Notes
A playful take on a classic favorite, bursting with summer vibes and colors that mirror the American flag. These easy-to-make ice cream sandwiches are perfect for gatherings.
- Prep Time: 15 minutes
- Cook Time: 12 minutes
- Category: Dessert
- Cuisine: American
Nutrition
- Serving Size: 12 sandwiches
- Calories: 250
- Sugar: 20g
- Fat: 12g
- Carbohydrates: 34g
- Fiber: 1g
- Protein: 3g
Keywords: ice cream sandwiches, summer dessert, American dessert, ice cream recipe, easy dessert