There’s something truly magical about the smell of fresh bread wafting through the kitchen. I still remember one rainy afternoon, years ago, when I decided to try my hand at baking bread for the first time. I had visions of myself with flour dusting my apron, emotions of pride bubbling within me as I pulled out a golden loaf from the oven. That day, while my house smelled like a little slice of heaven, I created my very first focaccia. Fast forward to today, and here I am, ready to share with you my beloved recipe for Crispy and Cheesy Garlic Parmesan Focaccia Bread.
This focaccia is not just any bread; it’s your ticket to cozy dinners, festive gatherings, or that perfect accompaniment to a hearty soup. It’s easy to whip up, and the flavors! Oh, the flavors take you right back to that delightful memory of sharing meals with friends and family. Let’s dive right into why this recipe is going to become your new favorite.
Why You’ll Love This Recipe
This Crispy and Cheesy Garlic Parmesan Focaccia bread quickly won a place in my heart (and stomach!) for several reasons. First and foremost, the smell. When it’s baking in the oven, your kitchen transforms into an Italian bakery, filling every corner with warm, inviting aromas. Trust me when I say it’s like a hug in bread form.
It’s incredibly easy to make, even if you’re new to bread-making. The dough is forgiving and doesn’t require complicated shaping or kneading. Plus, the combination of the crispy edges, soft center, and cheesy, garlicky goodness is simply irresistible. You’ll probably find yourself making this on repeat to share with friends, or perhaps just for a cozy night in with a glass of wine. Can you imagine it?
What It Tastes Like
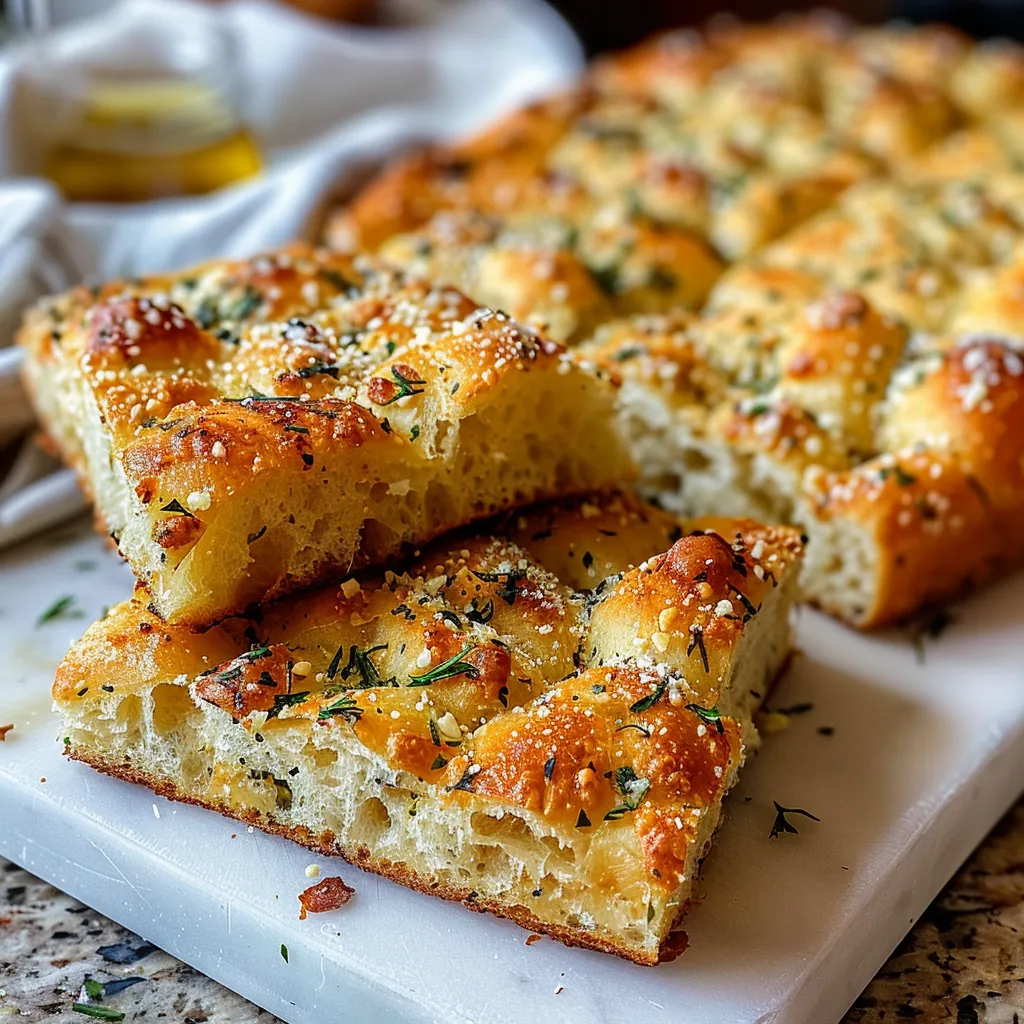
Picture this: You take a bite, and your teeth sink into a crust that is irresistibly crispy, followed by a soft, pillowy center. The first burst of savory garlic hits your palate, followed closely by the rich harmonious saltiness of Parmesan cheese. It’s like the warm comfort of a hug after a long day, comforting yet exciting. The sprinkle of herbs adds delightful earthiness that transports you straight to sun-drenched Italian summers.
This focaccia is the perfect blend of crispy and chewy, garlicky and cheesy—a flavor that whispers sweet nothings to your taste buds. Seriously, you’ll want to make a second batch to share, but don’t be surprised if half of it mysteriously disappears before it even hits the table!
Ingredients You’ll Need
- All-Purpose Flour (4 cups): This is the base of your focaccia, giving it structure and that lovely chewy bite.
- Warm Water (1 ½ cups): Activates the yeast—too cold, and it won’t rise; too hot, and you might kill it, so aim for that perfect warm temperature.
- Active Dry Yeast (2 teaspoons): This little magic dust is what makes your bread rise and become fluffy.
- Olive Oil (1/4 cup + extra for drizzling): Adds richness and moisture; it’s always good to drizzle a little more on top for that crunch!
- Parmesan Cheese (1 cup, grated): Adds a wonderful salty, nutty flavor that melds beautifully with garlic.
- Garlic (4 cloves, minced): The star of the show, imparting warmth and depth to every bite.
- Fresh Rosemary (2 tablespoons, chopped): This aromatic herb elevates the flavor and pairs beautifully with garlic and cheese.
- Salt (2 teaspoons): To enhance every flavor and bring everything together.
Optional Additions: Have fun with it! Try adding sun-dried tomatoes for a burst of sweetness or olives for an extra savory kick. A sprinkle of red pepper flakes can add welcome heat if you’re feeling adventurous.
Special Garnishes: For a professional touch, finish it off with a sprinkle of flaky sea salt right before serving. You could even drizzle a balsamic glaze over the top for a beautiful presentation.
Step-by-Step Instructions
Ready to get your hands a little floury? Let’s do this!
- Activate the Yeast: In a bowl, combine warm water and yeast. Let it sit for about 5-10 minutes until it gets foamy—this is the magic moment! Don’t skip this step; it ensures the yeast is active and ready to work its wonders.
- Combine Dry Ingredients: In a large mixing bowl, whisk together the all-purpose flour and salt. This step is crucial for evenly distributing the salt, which helps with flavor.
- Add Wet Ingredients: Pour in the activated yeast mixture and olive oil. Stir until a shaggy dough forms—don’t worry about making it perfect; we’ll knead it shortly.
- Kneading: On a floured surface, knead the dough for about 5-10 minutes until it becomes smooth and elastic. This is where the workout comes in, but it’s so worth it.
- First Rise: Place the dough in a greased bowl, cover it with a damp cloth, and let it rise in a warm place for about 1 hour or until it doubles in size. Patience, my friend!
- Prep the Pan: While the dough is rising, generously oil a baking sheet or a cast-iron skillet. This will ensure that delicious, crispy texture!
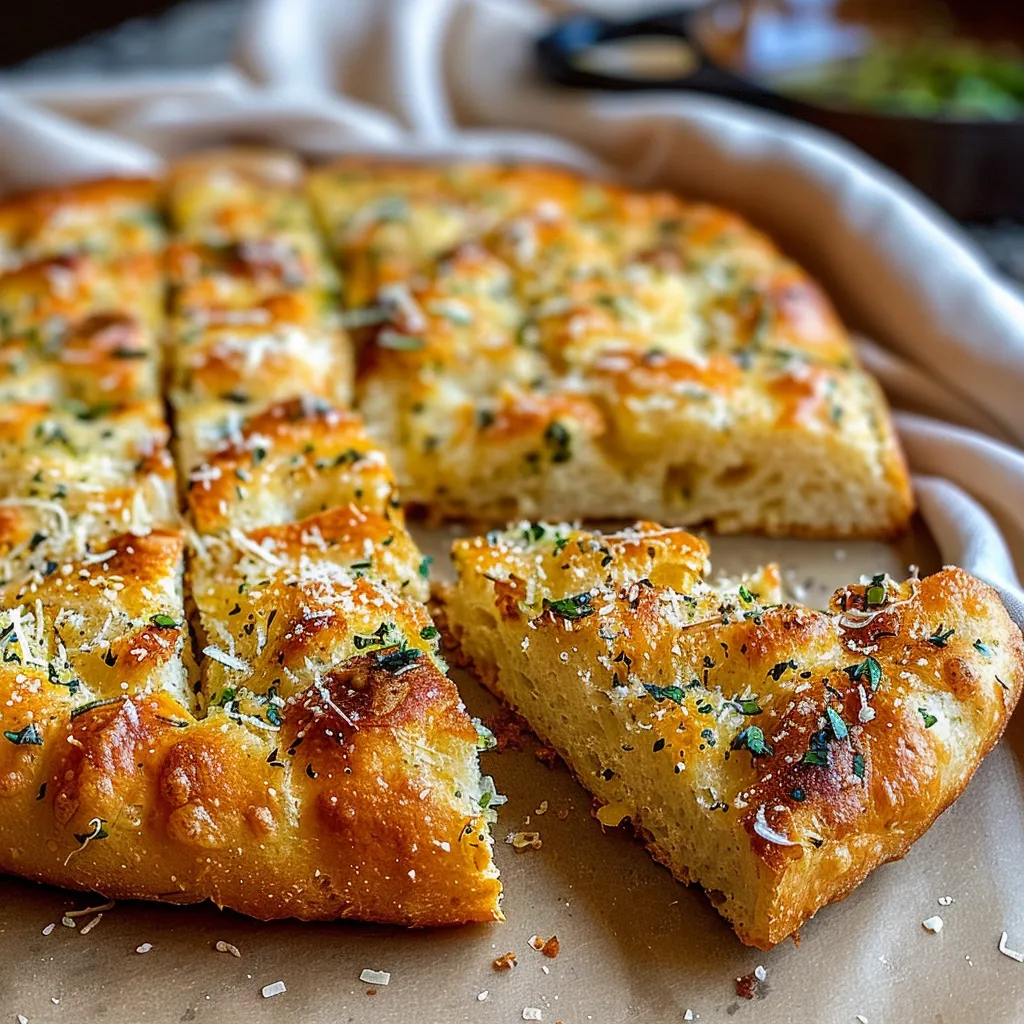
- Shape the Dough: Once the dough has risen, punch it down gently, and transfer it to the prepared pan. Use your fingers to stretch and press it out to fit the pan, making dimples as you go. Those dimples are essential! They hold onto all that glorious garlic oil and toppings.
- Second Rise: Let it rise again for about another 30 minutes—covered—until it puffs up slightly.
- Prepare the Topping: In a small bowl, mix the minced garlic, remaining olive oil, rosemary, and half of the grated Parmesan. Spoon it generously over the dough, making sure it gets into all those dimples.
- Bake: Preheat your oven to 425°F (220°C) and bake the focaccia for about 20-25 minutes or until golden brown. Halfway through, sprinkle the remaining Parmesan on top to get that gooey, cheesy finish.
Once it’s golden and glorious, remove it from the oven and let it cool for a few minutes before slicing. You’ll want to gobble it up right away, but just give it a moment!
Recipe Variations
This focaccia is incredibly versatile. Want something sweeter? Try adding some chopped figs or raisins in the dough. Feeling adventurous? Throw in some herbs like thyme or basil for a flavor twist! If you need a gluten-free option, swap the all-purpose flour for a good quality gluten-free flour blend, and you’ll still get to enjoy that comforting texture.
Serving & Storage Tips
For serving, slice each piece into generous squares and serve warm with a drizzle of extra virgin olive oil for dipping. You’ll impress your friends for sure! If you have leftovers (which is rare), store them in an airtight container at room temperature for up to 2 days. To reheat, simply pop them in the oven at 350°F (175°C) for about 5-10 minutes until warm.
Helpful Tips
Here are a few insights I’ve gathered over time:
- If you’re new to bread-making, don’t stress! Every baker has had their fair share of floppy loaves and overbaked disasters; embrace the learning curve.
- When handling the dough, remember that it’s okay if it’s a bit sticky. A little flour on your hands can help you manage it without losing too much moisture.
- Crispy edges come from generous oil—you really can’t skimp on this. It makes all the difference!
Honestly, my first batch turned out a bit too golden, but once I learned to keep an eye on it, I was on my way to perfecting this recipe!
Special Equipment
- Baking Sheet or Cast Iron Skillet: A good, sturdy pan ensures even baking and crisp edges. Plus, it’s just the right size for the perfect focaccia!
- Mixing Bowls: Get a good set—one for mixing the dough and another to let it rise. It just makes life easier.
- Dough Scraper: This nifty tool makes transferring and cutting your dough a breeze without creating too much mess.
Frequently Asked Questions
Can I make this focaccia ahead of time?
Absolutely! You can prepare the dough a day in advance and let it rise in the refrigerator. Just allow it to come to room temperature before baking.
What if I don’t have fresh rosemary?
No worries! You can use dried rosemary instead; just remember that dried herbs are more potent, so you’ll need less—about a teaspoon should do.
Can I freeze the focaccia?
Yes! Let it cool completely, then wrap it tightly in plastic wrap and foil. When you’re ready for a treat, just thaw at room temperature and reheat in the oven.
Why is my focaccia dense?
This could be due to a few reasons: the yeast might not have been fresh, or perhaps the dough didn’t rise enough. Always ensure to check the yeast activity and give it time to rise!
Can I add other toppings?
Definitely! Feel free to get creative. Roasted garlic, olives, or different types of cheese can add delightful twists to your focaccia.
What if I added too much flour?
If the dough feels too stiff or dry, you can add a bit more water—just do it gradually. It’s all about finding that perfect balance, and every batch can be a little different.
Conclusion
So there you have it—a warm, inviting slice of Crispy and Cheesy Garlic Parmesan Focaccia Bread that is sure to become a staple in your baking rotation. Whenever you need a cozy treat or a dish to impress your dinner guests, remember this recipe. It’s all about the joy of sharing incredible flavors and moments over a delicious loaf of bread.
Now, go ahead and give this recipe a whirl! I can’t wait for you to try it and for those heavenly aromas to fill your kitchen. Don’t forget to share your experiences in the comments—I’d love to hear how your focaccia turned out and what toppings you decided to treasure! Happy baking!
Print
Golden Crispy and Cheesy Garlic Parmesan Focaccia Bread Recipe
Bake up a batch of our Crispy and Cheesy Garlic Parmesan Focaccia Bread Perfectly golden its simple to make and great for weeknight dinners Try it today
- Total Time: 1 hour 40 minutes
- Yield: 12 servings 1x
Ingredients
Instructions
Notes
A warm, inviting slice of Crispy and Cheesy Garlic Parmesan Focaccia Bread that’s perfect for cozy dinners, festive gatherings, or as an accompaniment to soup.
- Prep Time: 15 minutes
- Cook Time: 25 minutes
- Category: Bread
- Cuisine: Italian
Nutrition
- Serving Size: 12 servings
- Calories: 200
- Sugar: 0 grams
- Fat: 12 grams
- Carbohydrates: 24 grams
- Fiber: 1 gram
- Protein: 7 grams
Keywords: Focaccia, Garlic Bread, Parmesan Bread, Italian Bread, Homemade Bread