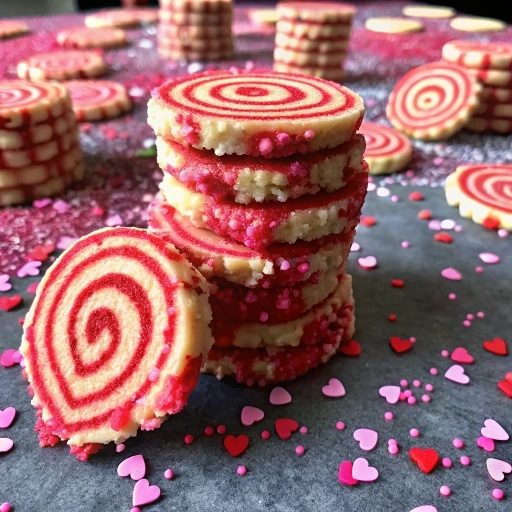
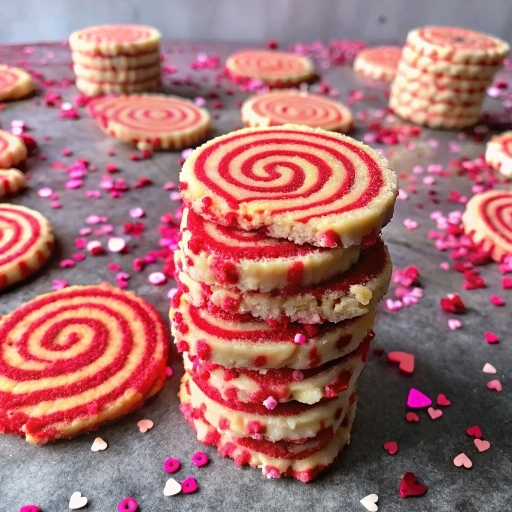
Valentine’s Day Swirl Cookies
There’s something magical about the approach of Valentine’s Day, isn’t there? The air is filled with a hint of romance, and hearts everywhere seem to beat just a little faster. It’s the time of year when little tokens of affection matter, and what better way to express your love than with a batch of homemade cookies? These Valentine’s Day Swirl Cookies have become a beloved tradition in my home, evoking memories of baking with my kids, who eagerly fight over who gets to swirl the colors. With vibrant hues and a delightful blend of flavors, these cookies are sure to impress — whether you’re sharing with your sweetheart or treating yourself to something special.
Why You’ll Love This Recipe
Let me tell you why you should roll up your sleeves and whip up a batch of these delightful swirl cookies. First of all, they’re incredibly easy to make. With simple ingredients that you likely already have in your pantry, you can channel your inner baker without the stress. Plus, they’re visually stunning! The beautiful swirls of pink and white dough create an eye-catching treat that’s perfect for any Valentine’s Day celebration—or just an afternoon pick-me-up. And let’s not forget the taste! They’re soft, buttery, and downright addictive, boasting just the right amount of sweetness. Trust me, you’ll want to make these time and time again!
What It Tastes Like
Imagine biting into a warm, soft cookie that has a slightly crisp edge, only to be met with a tender center that melts in your mouth. That’s what these swirl cookies offer! The buttery base combined with the hint of vanilla and a playful touch of strawberry (or red food dye for the swirls) creates a symphony of flavors. It’s like snuggling under a warm blanket on a chilly evening, or that first sip of hot cocoa on a snowy day. Every bite is a delightful little moment that makes you smile.
Ingredients You’ll Need
- 2 ¾ cups all-purpose flour: This is the foundation of our cookies, giving them structure while remaining tender.
- 1 teaspoon baking powder: Provides just the right lift, ensuring our cookies stay fluffy.
- ½ teaspoon salt: Balances the sweetness perfectly.
- 1 cup unsalted butter (room temperature): Adds richness and moisture, helping to create that melt-in-your-mouth texture.
- 1 cup granulated sugar: Sweetness, of course! Plus, it contributes to the cookie’s lovely texture.
- 1 large egg: Binds everything together and gives structure to the cookie.
- 2 teaspoons vanilla extract: Pure magic in flavor; it elevates the cookie and makes your kitchen smell divine.
- 1 tablespoon milk: Adds just a touch of moisture, keeping the dough from feeling too dry.
- Red food coloring (gel preferred): For that pop of Valentine’s spirit — or you can use strawberry or raspberry puree if you prefer!
Optional Additions: Ever tried adding a sprinkle of white chocolate chips? Or how about a dash of almond extract for a different take? The possibilities are endless!
Special Garnishes: A simple dusting of powdered sugar or a few sprinkles on top can elevate the presentation.
Step-by-Step Instructions
Ready to bring these beauties to life? Let’s do this!
- Preheat your oven to 350°F (175°C) and line your baking sheets with parchment paper.
- In a medium bowl, whisk together the flour, baking powder, and salt. Set this aside — think of it as your dry ingredients team!
- In a large bowl, cream together the softened butter and sugar until the mixture is light and fluffy. This step is where the magic starts—don’t rush it! The more you beat, the better the texture.
- Add in the egg, vanilla extract, and milk. Mix until combined. Your dough should start looking creamy and delicious.
- Gradually mix in the dry ingredients, making sure everything is well incorporated. The dough will be thick!
- Now comes the fun part—divide the dough in half. To one half, add a few drops of red food coloring and mix until you reach your desired shade. Keep in mind that gel food colors are more vibrant than liquid ones!
- On a clean surface (or a large piece of parchment paper), roll out the white dough and red dough separately into rectangles about 1/4 inch thick. Try to make them the same size for easy swirling!
- Place the red dough on top of the white dough. Starting from one end, carefully roll the dough into a log. Press gently to seal the edges.
- Chill the dough in the refrigerator for about 30 minutes — this is super important! It’ll make slicing much easier, and trust me, it prevents any chaos later on.
- Once it’s chilled, slice the log into about 1/4 inch cookies and place them on your prepared baking sheet, spacing them about 2 inches apart.
- Bake for 10-12 minutes or until the edges are lightly golden but the centers are still soft. Let them cool on a wire rack — if you can resist the urge to eat them straight out of the oven!
That’s it — pretty easy, right?
Recipe Variations
Feel free to mix things up! You could replace red food coloring with other colors that fit the mood—think pastel shades for Easter or green for St. Patrick’s Day. If you want to make them dairy-free, swap the butter for coconut oil. And for a bit of crunch, think about adding chopped nuts or sprinkles right before baking. The sky’s the limit!
Serving & Storage Tips
These cookies are best enjoyed fresh, but if you end up with leftovers (trust me, it’s rare), store them in an airtight container at room temperature for up to a week. To reheat, pop them in the microwave for just a few seconds—enough to warm them but not make them hard. And if you make a large batch? You can freeze the dough before slicing it; just wrap it tightly in plastic wrap, and it’ll last for about 3 months.
Helpful Tips
Here’s a little nugget of wisdom: avoid overmixing the dough once you add the flour. It can make your cookies tough, and nobody wants that! Also, keep an eye on your timer — I remember burning the first batch ever because I got too caught up in my latest binge-watching session. Learn from my mistake!
Special Equipment
- Baking sheets: A solid set of baking sheets is a must for even baking.
- Parchment paper: Prevents sticking and makes cleanup a breeze — trust me, you’ll thank me later!
- Rolling pin: Essential for rolling out that lovely dough into perfect rectangles.
- Wire rack: For cooling cookies, it helps maintain that perfect texture so they don’t become too soft.
Frequently Asked Questions
Can I use different colors for the swirls?
Absolutely! Feel free to use any color that sings to you. Just remember to adjust the amount of food coloring for a vibrant result!
What’s the best way to store these cookies?
Keep them in an airtight container at room temperature. They stay fresh for about a week. If you need them to last longer, consider freezing them!
How do I know when the cookies are done baking?
You’re looking for lightly golden edges. The centers will look a bit soft but will firm up as they cool. Trust your instincts—keep a close eye on them!
Can I make these gluten-free?
Yes! Just swap the all-purpose flour for a gluten-free blend. Make sure it’s a 1:1 ratio, and you should be good to go.
What can I add to the dough for extra flavor?
Consider adding chocolate chips, nuts, or spices like cinnamon. You could also swap vanilla for almond extract for a unique twist!
Conclusion
And there you have it! These Valentine’s Day Swirl Cookies aren’t just a treat; they’re a celebration of love, color, and sweetness. Whether you’re baking for a special someone or a cozy night in with family, these cookies will surely bring joy to any occasion. I can’t wait for you to try them out, and I’d love to hear how your baking adventure goes! Feel free to drop your thoughts in the comments below. Happy baking — I’m so excited for you to dive into this colorful culinary journey!
PrintSweet Festive Valentines Day Swirl Cookies to Melt Hearts
Bake these delightful Valentines Day Swirl Cookies featuring a unique marbled design and easy prep Perfect for sharing Try it today
- Total Time: 42 minutes
- Yield: 24 cookies 1x
Ingredients
- 2 ¾ cups of all-purpose flour
- 1 teaspoon of baking powder
- ½ teaspoon of salt
- 1 cup of unsalted butter, room temperature
- 1 cup of granulated sugar
- 1 large egg
- 2 teaspoons of vanilla extract
- 1 tablespoon of milk
- Red food coloring, gel preferred
Instructions
- Preheat your oven to 350°F (175°C) and line your baking sheets with parchment paper.
- In a medium bowl, whisk together the flour, baking powder, and salt. Set this aside.
- In a large bowl, cream together the softened butter and sugar until light and fluffy.
- Add in the egg, vanilla extract, and milk. Mix until combined.
- Gradually mix in the dry ingredients until well incorporated.
- Divide the dough in half. To one half, add a few drops of red food coloring and mix until desired shade.
- Roll out the white dough and red dough separately into rectangles about 1/4 inch thick.
- Place the red dough on top of the white dough. Roll the dough into a log and seal the edges.
- Chill the dough in the refrigerator for about 30 minutes.
- Slice the log into about 1/4 inch cookies and place them on the prepared baking sheet.
- Bake for 10-12 minutes or until the edges are lightly golden and the centers are still soft.
- Let them cool on a wire rack.
Notes
These Valentine’s Day Swirl Cookies have become a beloved tradition in my home, evoking memories of baking with my kids. With vibrant colors and a delightful blend of flavors, these cookies are sure to impress whether shared with a sweetheart or enjoyed solo.
- Prep Time: 30 minutes
- Cook Time: 12 minutes
- Category: Dessert
- Cuisine: American
Nutrition
- Serving Size: 24 cookies
- Calories: 150
- Sugar: 8g
- Fat: 7g
- Carbohydrates: 20g
- Fiber: 0g
- Protein: 2g
Keywords: Valentine’s Day cookies, swirl cookies, cookie recipes, baking, dessert