
There’s something magical about the way food can instantly transport us to another time and place. For me, Chicken Spring Rolls are a delightful reminder of warm summer evenings spent at my favorite Asian bistro, where the air was filled with tantalizing aromas and laughter. The crispy exterior and fresh, vibrant filling were perfection on a plate, especially when dipped in that unforgettable peanut sauce. If you’ve ever felt the urge to recreate that experience at home, you’re in for a treat. Not only are these spring rolls easy to prepare, but they also make for a fun cooking activity—perfect for getting the family involved or inviting friends over for an appetizer-making night!
Why You’ll Love This Recipe
Honestly, this recipe is a game changer. Not only is it quick to whip up, but everyone—including the pickiest eaters—falls in love with these crunchy bites. They’re packed with flavor, healthful ingredients, and let’s not forget how elegant they look on a platter! These Chicken Spring Rolls are great for gatherings, as they effortlessly blend that homemade touch with an air of sophistication. Plus, you can customize them to suit whatever’s in your fridge or pantry; the possibilities are endless!
What It Tastes Like
Imagine biting into a perfectly crisp shell, the sound echoing softly as a burst of flavors greets your taste buds. The seasoned chicken, fresh veggies, and occasional crunch of herbs bring together a harmony of tastes. Each bite is like a warm embrace that wraps you in comfort. And that dipping sauce? It’s the little finish that ties everything together—a creamy, nutty explosion that dances on your palate. Trust me, the first warm bite after a long day is like coming home again.
Ingredients You’ll Need
- 1 pound boneless, skinless chicken breast: Adds a juicy, savory element that stands out against the fresh vegetables.
- 2 cups shredded cabbage: Gives crunch and a subtle sweetness to balance the savory chicken.
- 1 carrot, julienned: Offers a touch of natural sweetness and vibrant color to your rolls.
- 1 cup bean sprouts: Adds a refreshing crunch—perfect for that delightful texture contrast.
- 1/4 cup chopped green onions: Provides a mild onion flavor that enhances the freshness of the ingredients.
- 2 cloves garlic, minced: Infuses the rolls with aromatic goodness.
- 1 tablespoon soy sauce: Just the right touch of umami to bring all the flavors together.
- Rice paper wrappers: This is what gives the spring rolls their fabulous, transparent exterior—fun to work with!
- Optional: Fresh herbs (like mint or cilantro): These can add a burst of freshness that makes each bite sing.
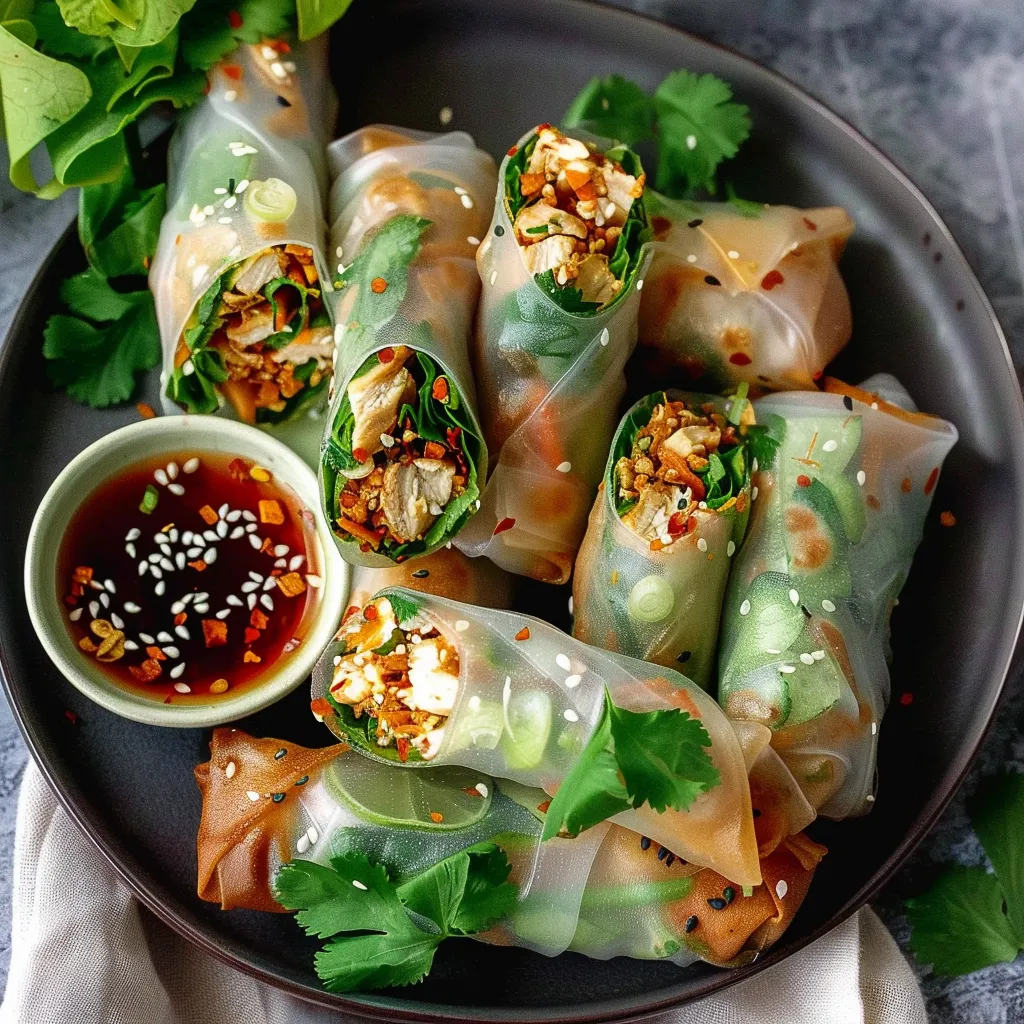
Special Garnishes: Don’t forget about serving your spring rolls with a zesty peanut sauce or tangy hoisin sauce for that extra kick!
Step-by-Step Instructions
Ready to bring the taste of summer bistros to your kitchen? Let’s dive in!
- Cook the Chicken: Start by poaching your chicken in a pot of simmering water—about 15 minutes should do it! Once cooked, shred it with two forks and set it aside.
- Prep the Veggies: While the chicken is cooking, julienne the carrot, chop the green onions, and shred the cabbage. Don’t worry about being perfect; just ensure everything is bite-sized.
- Mix It Up: In a bowl, combine the shredded chicken, cabbage, carrots, bean sprouts, green onions, garlic, and soy sauce. Toss it all together until everything is well coated. This is where the magic begins—don’t skip this step!
- Soften the Rice Paper: Fill a shallow dish with warm water. Dip a rice paper wrapper into the water for about 5 seconds until it’s pliable, but don’t let it get too soggy.
- Roll It Up: Place the softened wrapper on a clean surface. Spoon about 2 tablespoons of the filling onto the lower third of the wrapper. Fold up the bottom, then fold in the sides, and roll tightly—like a burrito! Repeat with the remaining wrappers.
- Pan-fry or Bake: You can either pan-fry them in a bit of oil until golden brown or bake them in a preheated oven at 400°F for 15-20 minutes if you’re feeling healthy!
That’s it—pretty easy, right? You’re almost there!
Recipe Variations
If you’re looking to shake things up, here are a few twists you can try:
- Custom Proteins: Swap the chicken for shrimp, pork, or tofu for a different flavor profile.
- Spice Levels: Add chopped chilies or a dash of chili oil for a spicy kick!
- Add Fruits: Ever tried adding mango or avocado? They can elevate your spring rolls to another dimension!
- Herb Infusion: Feel free to experiment with fresh herbs—basil or mint can really brighten things up.
Serving & Storage Tips
When it comes to serving, presentation is key! Arrange your spring rolls neatly on a platter with your sauce of choice in a small bowl for dipping. A sprinkle of sesame seeds on top isn’t just beautiful—it adds an extra crunch!
As for leftovers, they can be stored in an airtight container in the fridge for 2-3 days. To reheat, I recommend an oven or air fryer for that crispy finish. Trust me—microwaving them just doesn’t do their crispy texture justice.
Helpful Tips
Here’s where I share a little wisdom gleaned from my own kitchen adventures:
- Don’t over soften the rice wrapper; a little firmness goes a long way in maintaining shape during the rolling process.
- Keep a damp cloth nearby to cover the wrappers that you’re not using to prevent them from drying out.
- For a bit of extra flavor, consider marinating your chicken in a bit of soy sauce or sesame oil beforehand.
- And remember, practice makes perfect! My first spring rolls looked more like unformed blobs, but I promise it gets easier.
Special Equipment
- Shallow Dish: You’ll need this for soaking the rice paper wrappers.
- Sharp Knife: For easy, precise chopping of your vegetables—you want everything to fit snug in the wrappers!
- Frying Pan or Baking Sheet: Depending on whether you’re frying or baking, having the right pan will enhance your outcomes.
- Wooden Spoon or Spatula: Perfect for mixing and combining ingredients thoroughly.
Frequently Asked Questions
Can I make these spring rolls ahead of time?
Absolutely! You can prepare the filling and store it in the fridge for up to two days. Just roll them up right before you’re ready to serve to keep everything fresh and crispy.
What’s the best dipping sauce for spring rolls?
A classic peanut sauce is always a hit! But if you prefer something a little tangier, try a hoisin sauce or even a spicy sweet chili sauce.
How do I keep rice paper wraps from sticking?
As you work with the wrappers, make sure to keep them covered with a damp cloth to prevent them from drying out. Also, oiling your surface lightly can help!
Can I freeze spring rolls?
You can! Just make sure to freeze them uncooked in a single layer on a baking sheet, then transfer to a zip-top bag. When you’re ready to eat, cook from frozen—just add a couple of extra minutes to the cooking time.
Conclusion
And there you have it! Your own homemade Chicken Spring Rolls that’ll blow everyone away. Whether for a cozy night in, a gathering with friends, or an extra-special family dinner, these rolls are a hit every single time. I can’t wait for you to try them! Share your experience in the comments below—you might just inspire someone else to dive into their own culinary adventures. Remember, cooking is all about love, experimentation, and savoring every moment… so get rolling!
Print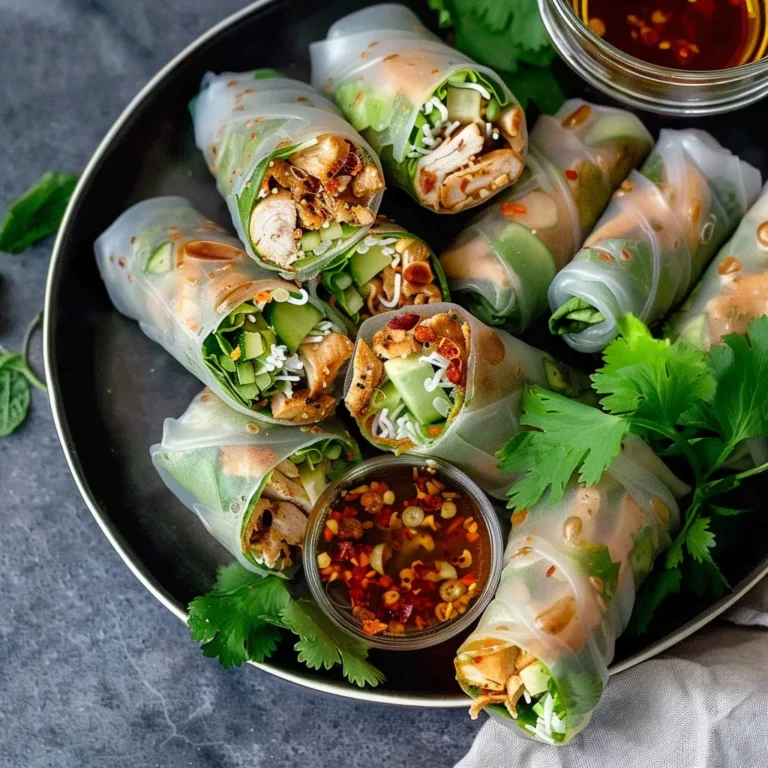
Crispy Chicken Spring Rolls: Quick & Flavorful Homemade Treats
Enjoy crispy Chicken Spring Rolls bursting with flavor and made in under 30 minutes! Perfect for weeknight dinners. Try it today for a tasty treat!
- Total Time: 45 minutes
- Yield: 4 servings 1x
Ingredients
Instructions
Notes
Enjoy delicious homemade Chicken Spring Rolls that are crispy on the outside and packed with savory filling, perfect for any gathering or family dinner.
- Prep Time: 30 minutes
- Cook Time: 15 minutes
- Category: Appetizer
- Cuisine: Asian
Nutrition
- Serving Size: 4 servings
- Calories: 250
- Sugar: 2g
- Fat: 10g
- Carbohydrates: 25g
- Fiber: 3g
- Protein: 20g
Keywords: Chicken Spring Rolls, Asian Appetizer, Healthy Spring Rolls, Homemade Spring Rolls


