There’s something truly special about a cozy evening spent in the kitchen, the aroma of sweetness wafting through the air, and the anticipation of sharing delightful treats with loved ones. One of my favorite memories is of my younger self perched on a stool, watching my mom mix peanut butter and oats, a ritual that would eventually lead to the creation of these no-bake peanut butter bars. The joy of licking the spoon is a memory I hold dear, much like these bars themselves—simple, comforting, and a sure crowd-pleaser. Today, I’m excited to share a recipe that captures that sense of nostalgia and warmth, with an added twist of dark chocolate that elevates these bars to pure bliss.
Why You’ll Love This Recipe
Let me tell you why this recipe is a must-try. First off, it’s a no-bake treat, meaning you can whip it up without turning on your oven, which is a dream come true during those hot summer months or when life just gets too hectic. These bars are packed with wholesome ingredients, making them a tempting yet guilt-free snack for kids and adults alike. They’re perfect for satisfying that persistent sweet tooth while being surprisingly simple in terms of both prep time and technique. Honestly, whether you’re hosting a gathering, looking for an after-school snack, or treating yourself after a long day, these bars will always hit the spot.
What It Tastes Like
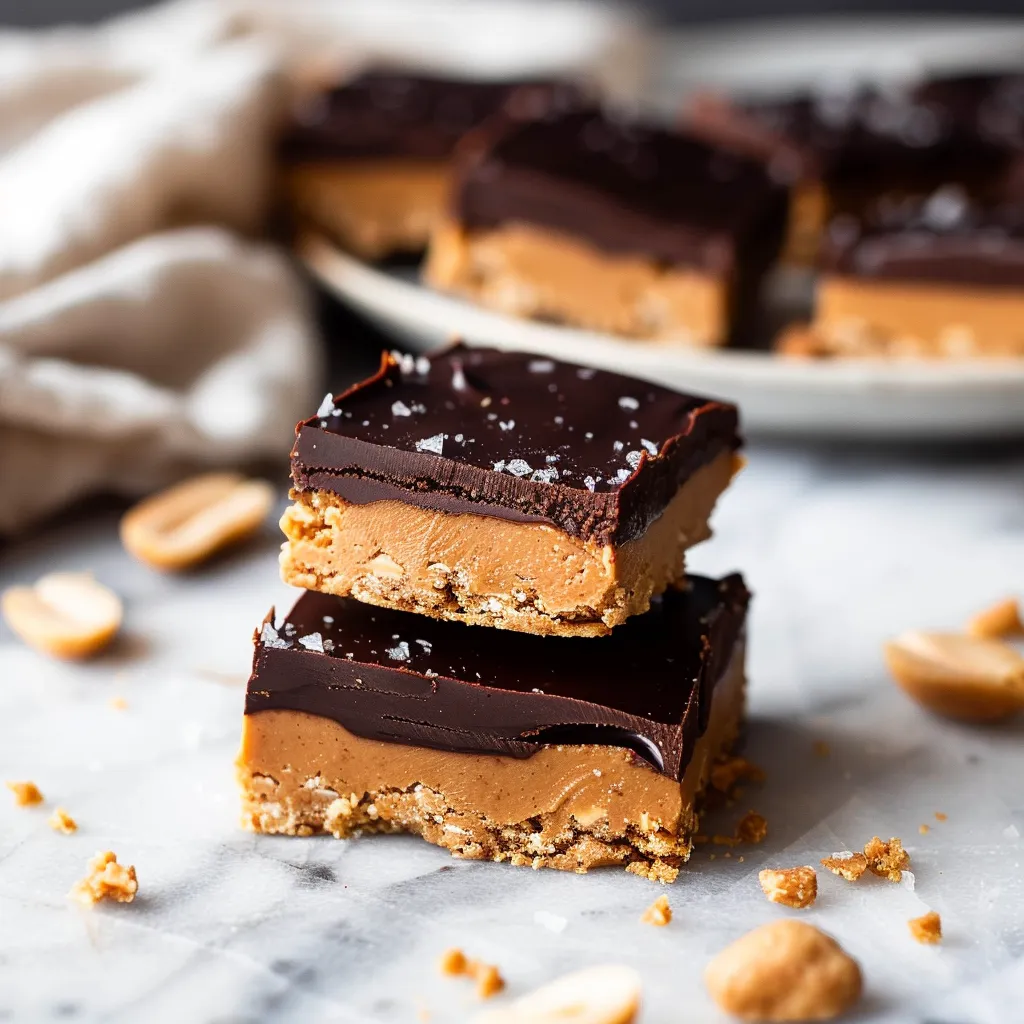
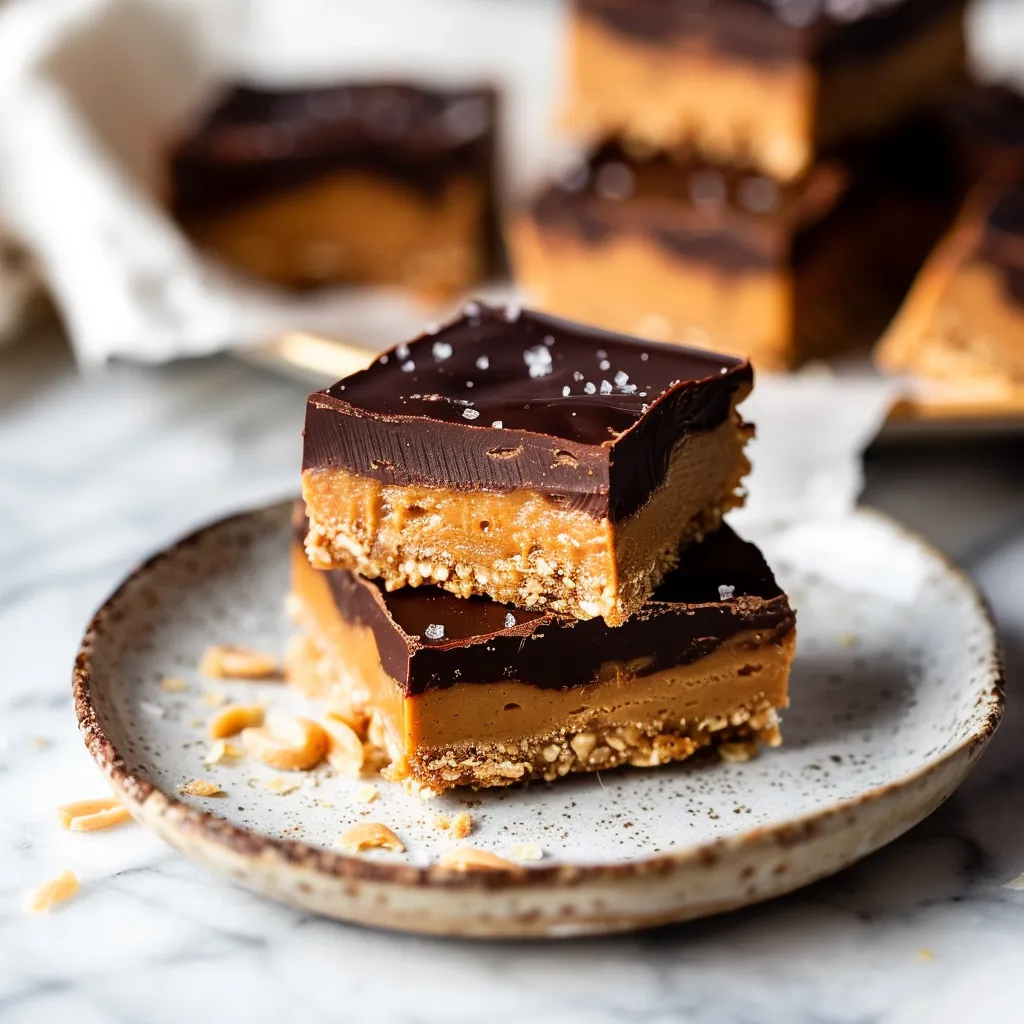
Imagine taking a bite of one of these bars after a long day—it’s like a warm hug for your taste buds. The creamy peanut butter melds perfectly with the touch of honey, creating a rich, nutty flavor that sings comfort. Then, just when you think it can’t get any better, you hit that silky dark chocolate layer, which adds a satisfying richness that balances the sweetness. The texture is wonderfully delightful too—chewy yet crumbly, perfectly complementing that smooth chocolate. Each bite feels like a cheerful little party in your mouth, perfect for any time of day.
Ingredients You’ll Need
- 1 cup creamy peanut butter: Adds a creamy touch that balances the sweetness.
- 1/2 cup honey or maple syrup: Provides natural sweetness and binds the bars together.
- 2 cups rolled oats: Gives a hearty texture and makes these bars filling.
- 1/2 tsp vanilla extract: Adds depth to the flavor profile.
- 1/2 cup dark chocolate chips: Melts beautifully for that irresistible top layer.
- 1 tbsp coconut oil: Helps the dark chocolate set nicely.
Optional Additions: Feel free to throw in some chopped nuts, dried fruits, or even a pinch of sea salt for an extra flavor dimension!
Special Garnishes: Drizzle some melted chocolate on top for that professional touch or sprinkle with crushed nuts to make it fancy!
Step-by-Step Instructions
Ready to get started? Let’s make some peanut butter magic happen!
- Mix the Base: In a medium mixing bowl, stir together the peanut butter, honey (or maple syrup), and vanilla extract until well combined. This is where the sweet magic begins—trust me on this one, don’t skip this step—it’s where the flavor develops!
- Add the Oats: Gradually fold in the rolled oats until everything is mixed well. You want a sticky, cohesive mixture that holds together nicely.
- Press into the Pan: Line an 8×8 square pan with parchment paper for easy removal. Press the mixture firmly into the pan; get in there with your hands if needed. Keep it compact—the firmer it is, the easier to cut.
- Prepare the Chocolate Layer: In a microwave-safe bowl, combine dark chocolate chips and coconut oil. Microwave in 20-second intervals, stirring in between, until smooth. Pour this over the peanut butter base and spread it evenly.
- Chill: Place the pan in the fridge for about 1-2 hours or until the chocolate has hardened. Patience is key here! The wait is so worth it!
- Slice and Serve: Once fully set, lift the bars out using the parchment paper and cut into squares. Enjoy that satisfying crunch of the knife through the bars!
Recipe Variations
Feeling adventurous? Here are a few fun ideas to mix things up:
- Nutty Variation: Try adding chopped almonds or walnuts for an extra crunch.
- Flavor Twist: Add a tablespoon of cocoa powder to the peanut butter mixture for a chocolate-peanut butter combo.
- Protein Boost: Mix in a scoop of your favorite protein powder for a post-workout snack.
Serving & Storage Tips
These bars are perfect for serving at gatherings and great for taking on the go! Arrange them on a plate and sprinkle some extra chocolate chips or nuts on top before serving for a beautiful presentation.
As for storage, keep them in an airtight container in the fridge for up to a week. If you’ve got leftovers (which I highly doubt!), they will hold up well in the freezer for up to a month. Just remember to separate layers with parchment paper to prevent sticking.
Helpful Tips
Here are some insights I’ve gathered over the years to ensure your no-bake peanut butter bars turn out just right:
- Make sure to use creamy peanut butter for a smooth texture that blends easily.
- Press firmly when adding the mixture to the pan to avoid crumbly bars.
- If the chocolate doesn’t seem to set, it might not have enough coconut oil; adding a little more can help.
Special Equipment
- 8×8 Square Pan: Essential for shaping your bars perfectly.
- Parchment Paper: Helps with easy removal and avoids a sticky mess.
- Mixing Bowls: A good set for combining ingredients thoroughly.
- Microwave-Safe Bowl: Needed for melting chocolate effortlessly.

Can I use crunchy peanut butter instead of creamy?
Absolutely! Crunchy peanut butter will give your bars an extra texture and delightful crunch. Just know that it may affect how well it binds together.
Do I need to refrigerate these bars?
Yes, refrigeration is crucial! It helps set the chocolate and keeps your bars firm. Plus, they’re a refreshing treat straight from the fridge!
Can I substitute honey with something vegan?
Yes, maple syrup is a perfect substitute if you’re aiming for a vegan version! It adds a lovely flavor without compromising the sweetness.
How long can I store these bars?
They can be stored in the fridge for about a week, and if you freeze them, up to a month. Just be sure to keep them in an airtight container!
What type of chocolate should I use?
I recommend using dark chocolate for a rich flavor, but semi-sweet or even milk chocolate works too, depending on your personal taste!
Conclusion
So there you have it—your ticket to sweet, chewy bliss right from your kitchen! These no-bake peanut butter bars with their luscious dark chocolate layer are not just a recipe; they’re a celebration of flavor and memory. I can’t wait for you to try them out—trust me, your friends and family will rave about them!
I’m always eager to hear how your kitchen adventures turn out, so please share your experience in the comments! Whether you stick to the classic recipe or venture off the beaten path with your variations, remember that the heart of cooking lies in the joy it brings. Happy baking, or should I say, mixing! Until next time!
Print
No-Bake Peanut Butter Bars with a dark chocolate layer
Savor these No-Bake Peanut Butter Bars with a rich dark chocolate layer—a simple, delicious treat perfect for weeknights! Try it today!
- Total Time: 2 hours 20 minutes
- Yield: 16 bars 1x
Ingredients
Instructions
Notes
These no-bake peanut butter bars are a delightful treat featuring creamy peanut butter, rolled oats, and a sumptuous dark chocolate layer. They are easy to make and perfect for sharing.
- Prep Time: 20 minutes
- Category: Dessert
- Cuisine: American
Nutrition
- Serving Size: 16 bars
- Calories: 150
- Sugar: 8 grams
- Fat: 7 grams
- Carbohydrates: 18 grams
- Fiber: 2 grams
- Protein: 5 grams
Keywords: no-bake peanut butter bars, healthy dessert, quick recipe, dark chocolate layer, peanut butter snacks


